Introduction
The IoT, which is one of the core concepts in the field of Robotics and Automation, makes Arduino UNO R4 Boards an excellent choice for you. These new Arduino R4 Boards are the latest release from the Arduino Family, and I must say they are not only easy to learn with, but also reasonably priced. So, let’s dive into today’s topic and take your DIY projects to the next level. In this post, we’ll explore the basics of Arduino UNO R4, its key features, what distinguishes it from its predecessors, and, most importantly, how you can use it to create amazing IoT and tech projects. For this, stay tuned for more articles related to these boards.
In this post, we’ll learn about the Basics of Arduino UNO R4, its key features, what makes it different from its predecessors, and most importantly, how you can use it to create awesome IoT and tech projects. For this, stay tuned for more articles related to these Boards.
What is Arduino UNO R4?
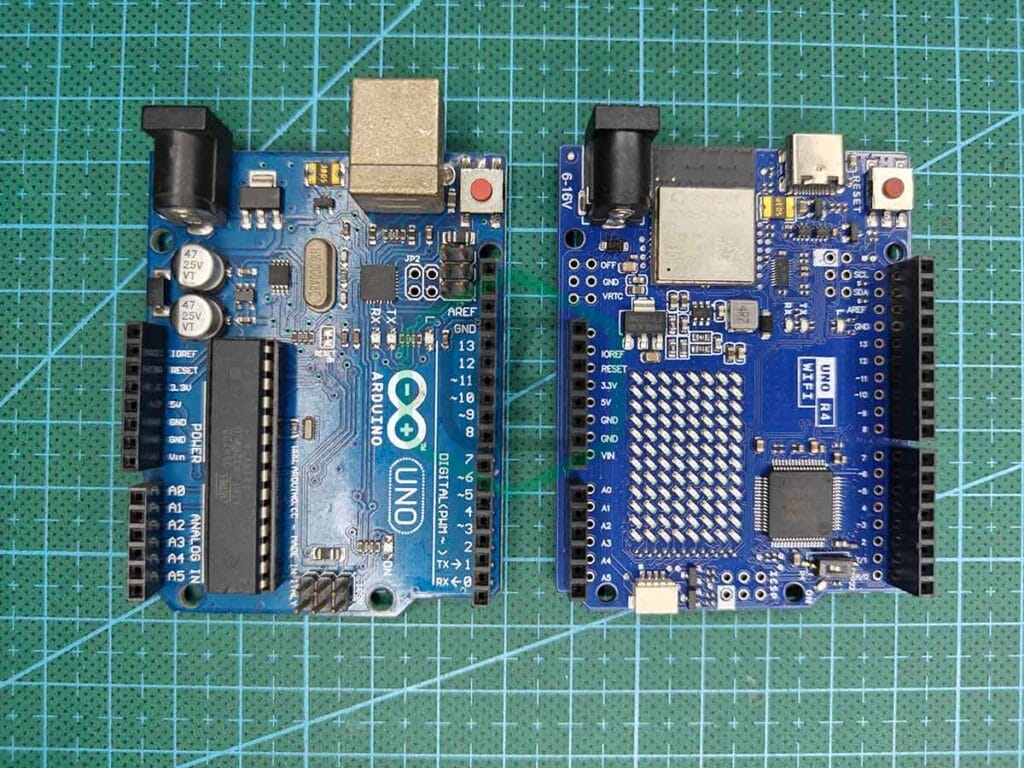
The Arduino UNO R4 boards are the latest development in the popular Arduino series. But, this time we have two boards, Arduino UNO R4 Wi-Fi & Arduino UNO R4 Minima. Both of these boards come in the same size as regular Arduino boards. However, both versions differ in features, thus have different applications for each. In further sections, we’ll see the features and differences in both versions.
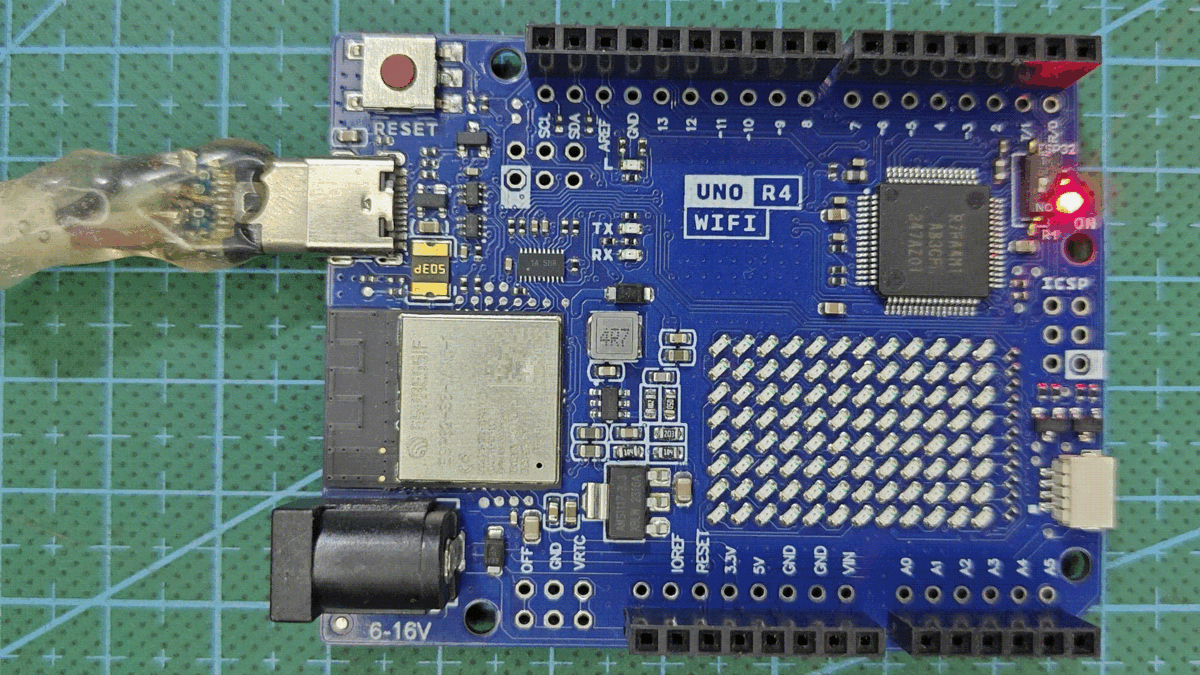
For an overview, the Arduino UNO R4 Wi-Fi, as the name suggests, comes with a Wi-Fi module, particularly ESP32-S3(ESP32-S3-MINI-1-N8), along with the regular Arduino Board functionality. This eases up the task of attaching separate Wi-Fi or Bluetooth modules to the board when we need them. Along with this, it also comes with a 12 × 8 LED matrix that can be used in various ways that we’ll learn in some projects and tutorials.
As for Arduino UNO R4 Minima version, there isn’t much of a change from the regular Arduino version that has been there in the market for so long, but a good initiative is to provide the SWD header. SWD stands for Serial Wire Debug, which can be hooked up to an external Debugger tool to get the status of the program issue in case you are stuck at some point during programming the board. For more on this, stay tuned so that we can discuss this in detail.
Key Features & Specifications
Arduino UNO R4 Wi-Fi:
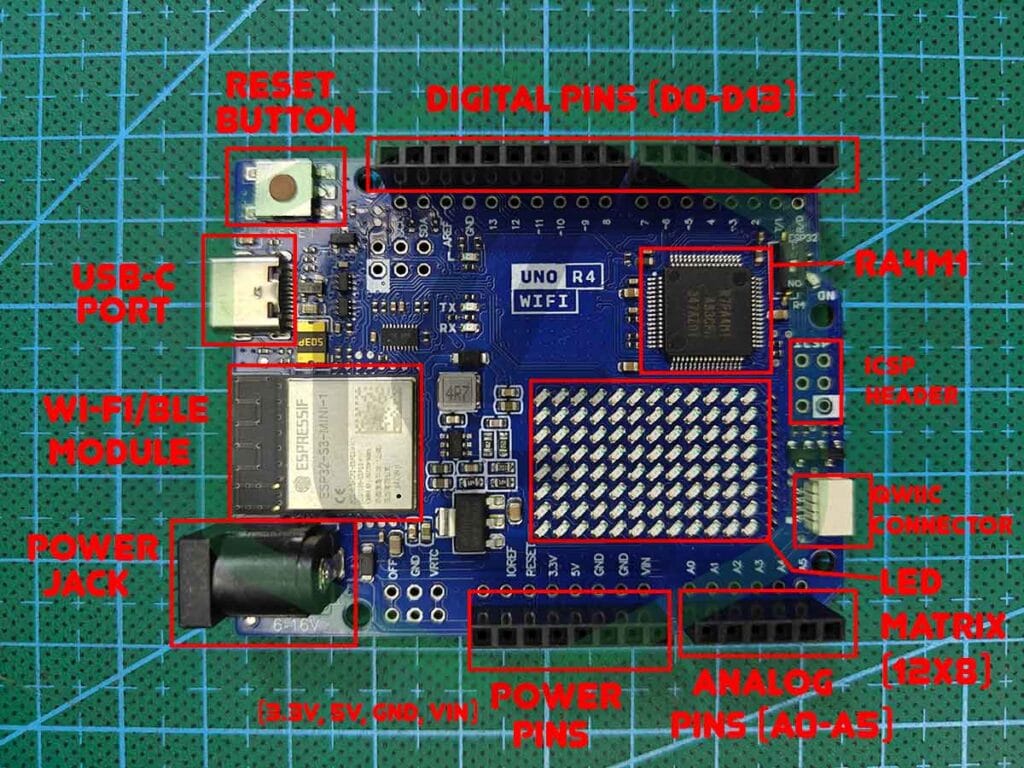
Key Features:
- Enhanced Processing Power: Powered by the Renesas RA4M1 32-bit ARM Cortex-M4 microcontroller, runs at a maximum clock speed of 48 MHz.
- Integrated Connectivity: ESP32-S3 for Wi-Fi and Bluetooth(BLE) functionality for IoT.
- USB-C for Power and Data: Modern connector for ease.
- 12-bit DAC, 14-bit ADC, RTC, CTSU, MPU.
- 12 × 8 LED Matrix.
Specifications:
- Microcontroller: Renesas RA4M1 32-bit ARM Cortex-M4 with FPU, ESP32-S3-MINI-1-N8.
- Clock Speed: 48 MHz, Up to 240 MHz (ESP32-S3)
- Flash Memory: 256 kB, 384 kB
- RAM: 32 kB, 512 kB (SRAM)
- EEPROM: 8 kB
- Digital I/O Pins: 14
- Analog Input Pins: 6
- PWM Channels: 6
- DAC, ADC: 12-bit x 1, 14-bit x 1
- USB Connectivity: USB-C
- RTC(Real-Time Clock), CTSU (Capacitive Touch Sensing Unit), MPU (Memory Protection Unit)
- Wi-Fi: Integrated Wi-Fi module
- Bluetooth: BLE (Bluetooth Low Energy) support
- Power Supply: 5V (via USB-C)
- Operating Voltage: 5V, 3.3V
- Input Voltage: 6-24 V
- Communication: UART, I2C(Qwiic connector provided), SPI, CAN
- HID Support
- 12 × 8 LED Matrix
For more detailed information, you can look at the product datasheet.
Arduino UNO R4 Minima
Key Features:
- Ultra-Low Power Consumption: Optimized for energy-efficient applications, ideal for battery-powered or remote deployments.
- Real-Time and Low-Latency Performance: Real-time, low-latency for IoT and Embedded operations.
- Efficient Resource Management: Minimizing CPU & Memory Usage while maintaining HIGH performance.
- SWD: Connector for external debugger tool
Specifications:
- Microcontroller: Renesas RA4M1 32-bit ARM Cortex-M4 with FPU
- Clock Speed: 48 MHz
- Flash Memory: 256 kB
- RAM: 32 kB
- EEPROM: 8 kB
- Digital I/O Pins: 14
- Analog Input Pins: 6
- PWM Channels: 6
- DAC, ADC: 12-bit x 1, 14-bit x 1
- USB Connectivity: USB-C
- RTC(Real-Time Clock), CTSU (Capacitive Touch Sensing Unit), MPU (Memory Protection Unit)
- Power Supply: 5V (via USB-C)
- Operating Voltage: 5V
- Input Voltage: 6-24 V
- Communication: UART, I2C, SPI, CAN
- HID Support
- SWD Connector
For more detailed information, you can look at the product datasheet.
What’s New in the Arduino UNO R4?
There’s only one question that arises: Why do we need a NEW ARDUINO UNO R4 Board? Well, the answer is rather simple: change is the law of nature. The new Arduino UNO R4 boards come with several updates and improvements over their predecessors. Overall, increasing their power and usability for projects that can now be built using them. Some key upgrades are as follows:
- Microcontroller: R4 is based upon Renesas RA4M1, which is an ARM-Cortex-M4-based 32-bit microcontroller, while the previous versions were based on ATMEGA328P 8-bit microcontroller. This is a 4 times increase in the microcontroller Architecture that enhances efficiency, offering faster speeds, more memory(registers), and significantly giving a performance boost overall.
- Clock Speed: With a 48MHz clock speed as compared to 16MHz previously, UNO R4 offers 3x faster processing. This is good for projects that require faster calculations and decision-making tasks.
- Memory & Storage: R4 is equipped with 32 kB of RAM, 256 kB of flash memory, and 8 kB of EEPROM, which, when compared to the previous version 2 kB of RAM, 32 kB of flash storage, and 1 kB of EEPROM, seems to a quite a log increase. This could result in a greater number of projects that can now be built using the Arduino board, unlike switching to different boards like ESP32 and STM32.
- Connectivity: This is a huge upgrade to the Arduino series as the previous version uses the ESP8266 chip, but the new version comes with the ESP32-S3 chip, which not only gives WiFi but also Bluetooth BLE for in a single board. Although this is only the case for the Wi-Fi version of the board, the Minima version is as simple as its predecessors.
- I/O & Features: Both Arduino version R3 and R4 comes with 14 Digital pins, 6 Analog pins, 6 PWM Pins but the increase is the 14 External Interrupts from 2 External Interrupts, which is more valuable in tasks like locomotion of motors with encoders. Moreover, the features like RTC, CTSU, and MPU are also a plus point for the Arduino UNO R4 Series. One more addition to this is a 12-bit DAC along with a 14-bit ADC, which was only a 10-bit ADC in previous versions.
- Communication & Connectors: the communication protocols like SPI, I2C, UART were normal, but in the new version, it has a separate UART for code uploading and one on the D0 & D1 pins. Also, R4 has a CAN Bus that can be considered crucial for some projects that require subtle STM32-like functionality. Moreover, the Minima version has an SWD connector that can be connected to an external debugger to debug the errors encountered by the chip while running the code.
Uses & Projects
The Arduino UNO R4 Boards offer a wide range of possibilities for projects that depending on how they are used. As it comes in two models with Wi-Fi + Bluetooth and a simple one so some project ideas as below. I’ll make such a project based on the boards and mention the project’s link when updated, so make sure to stay tuned.
- Smart Home Automation: Build connected devices that can be controlled remotely via Wi-Fi. For example, create a WI-Fi enabled light switch that you can turn on and off through a smartphone app.
- Weather Station: Use the board to collect environmental data from sensors like temperature, humidity, and pressure. With its WiFi capabilities, you can push this data to the cloud or a web server for real-time monitoring.
- Remote Monitoring Systems: Whether you’re monitoring industrial equipment or keeping track of plants in your garden, the R4 allows you to send status updates or alerts to your phone or computer.
Getting Started with Arduino UNO R4
Now that we have learned about Arduino UNO R4 and its features, it’s time to explore some practical aspects. This section will go through the basic steps to set up your Arduino UNO R4, install the necessary software, and upload your first program.
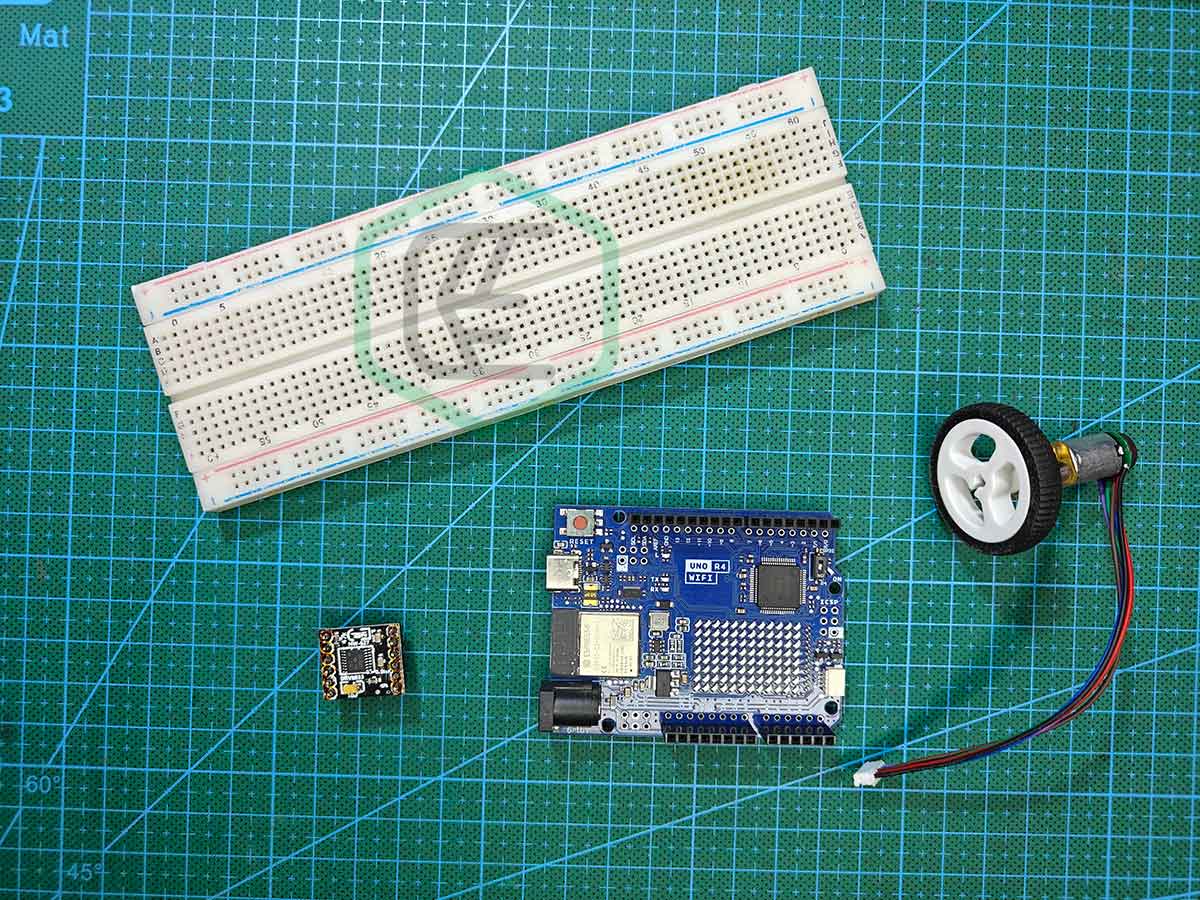
Step 1: Materials Required
Before we begin the code part, make sure you have some materials with you to start with. These materials can be easily found in local or online stores. You can choose anyone you want, however, the clone and authenticity of the product is not guaranteed, so choose wisely.
- Arduino UNO R4 Board (Wi-Fi Preferred)
- USB-C cable
- Breadboard (Optional)
- Jumper Wires (Optional)
- LED (any color) with resistor (220 ohms)(Optional)
While purchasing the products, make sure of the above considerations, and the products should not have any visible damage.
NOTE: I’ll be using the ARDUINO UNO R4 Wi-Fi version, as I have that also. That one is the clone version available in the local market, you can choose the authentic one or the MINIMA version. Instruction in the subsequent section will be for both, so don’t worry. Lastly, there is no difference between the clone and the genuine version that might affect its working, so feel free to choose any.
Step 2: Installation
The next step is to install the required software. Arduino IDE is the go-to and recommended option, and it is very easy to use. You can also use other code editors like VS Code, but then you need to upload the code via the command line, increasing the steps and complexity.
For this, you need to install the Arduino IDE from the official Arduino website: arduino.cc
For installation, follow the instructions in the installer during the installation. During installation, you might encounter some driver installation prompts; make sure to accept them. Also, if you are installing the IDE other than Windows, it is also simple; you just need to follow the instructions, and you are good to go.
Step 3: Connection and port selection
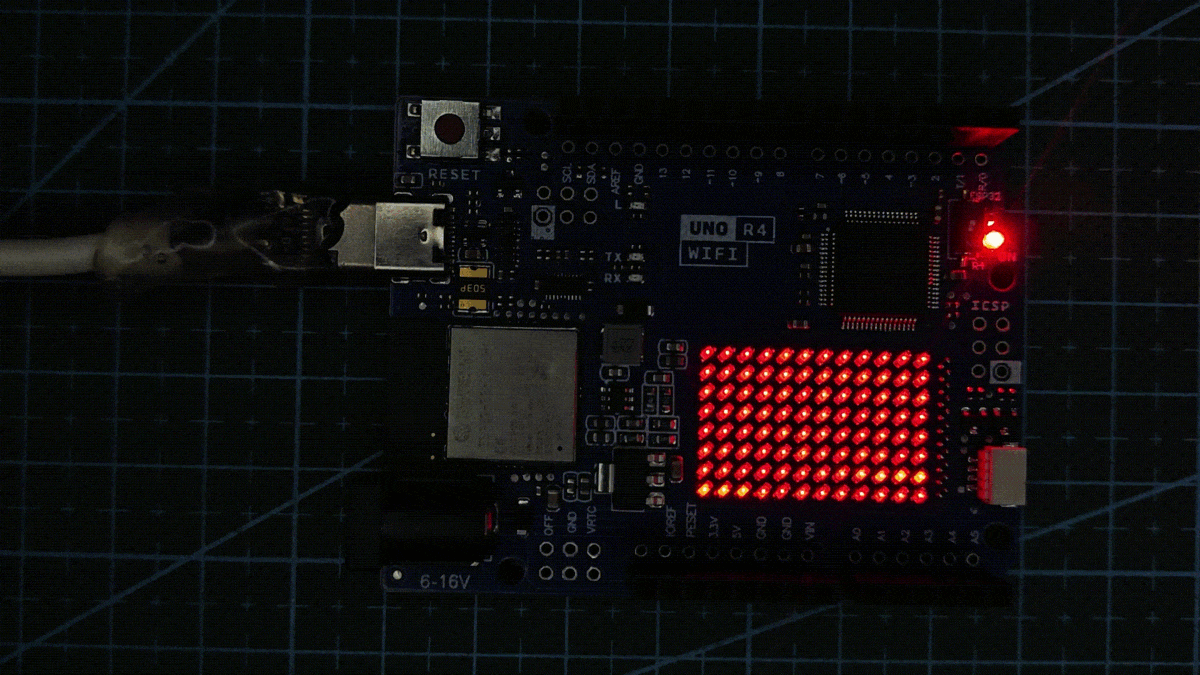
Next comes the connection of the Boards to your system and selecting the port on the IDE. For this, you’ll need a USB-C cable with the other end however you want, Type-A, Type C, or any other as your choice. If this is your first time hooking up your board to the System(aka powering it up), you might see the heartbeat animation on the LED Matrix of the Wi-Fi version. Meanwhile, for the MINIMA version, there’ll be just a glow of power up and blinking of the L-marked LED.
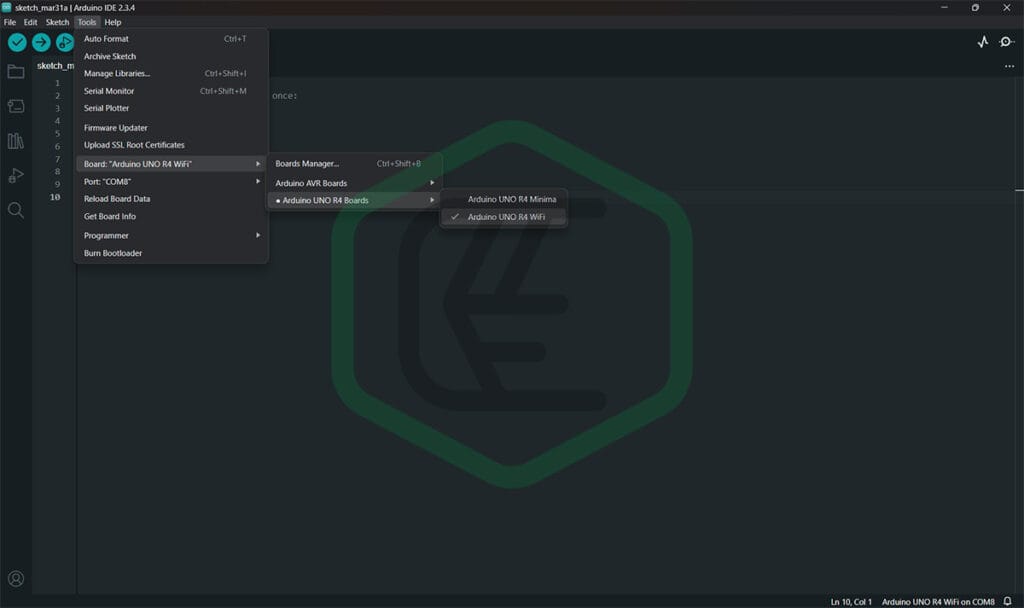
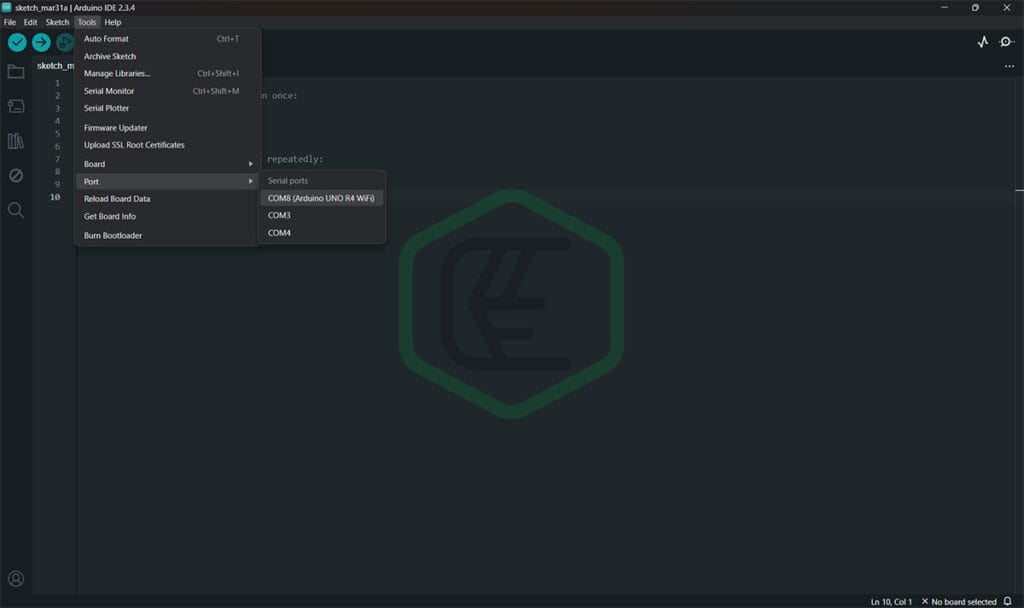
To select the port, follow the steps below:
Open Arduino IDE
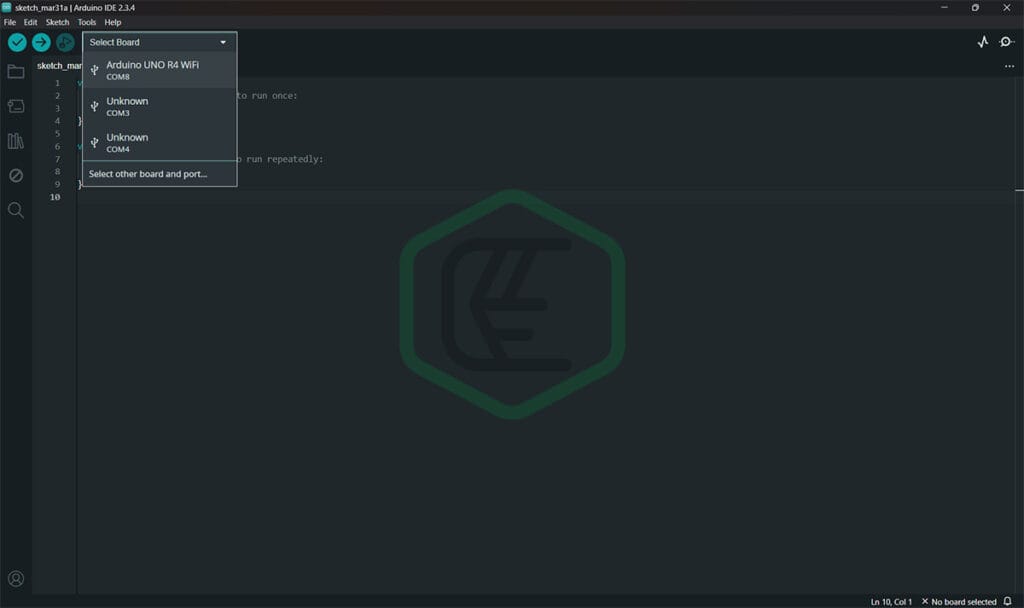
To select port you can do that in two ways. Navigate to Tools -> Port -> <Select Appropriate Port> , the board will be selected automatically if not then select the board from Tools -> Boards -> Arduino UNO R4 Boards -> <select the board you have>. Or you can just click on the drop down menu on the IDE and select both board and port from there.
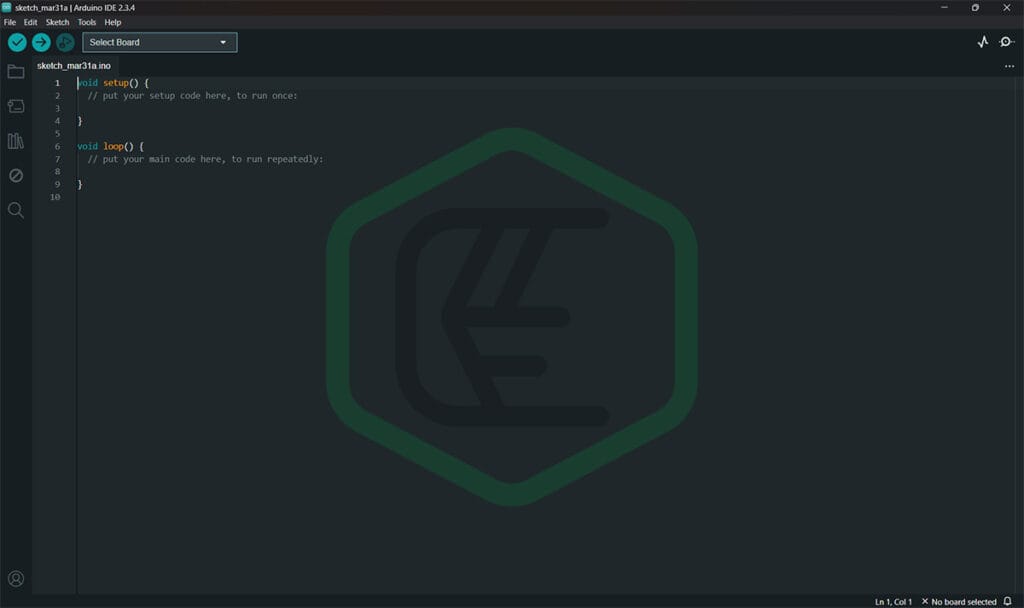
Step 4: Uploading Sketch
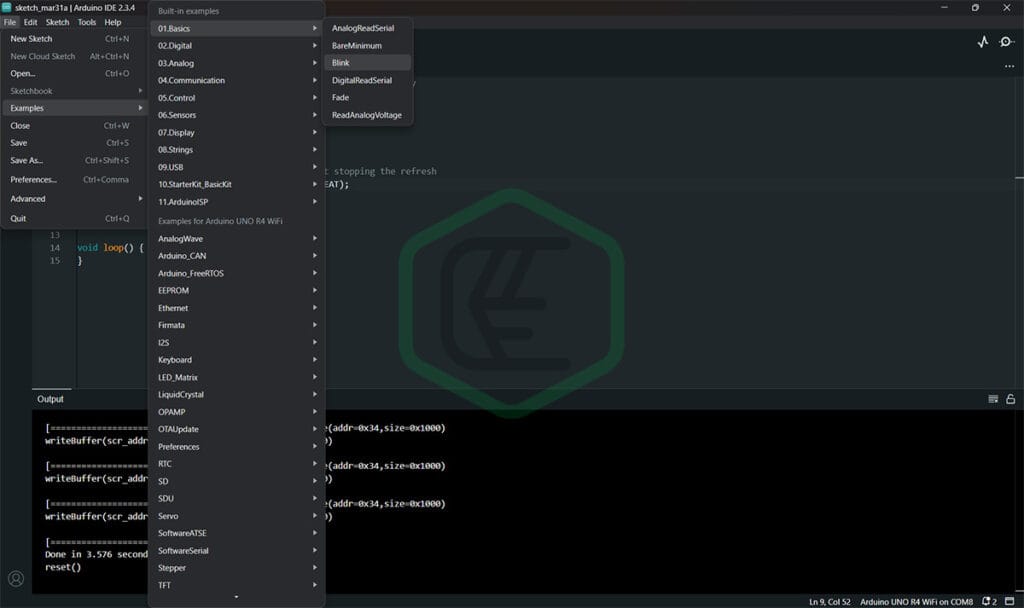
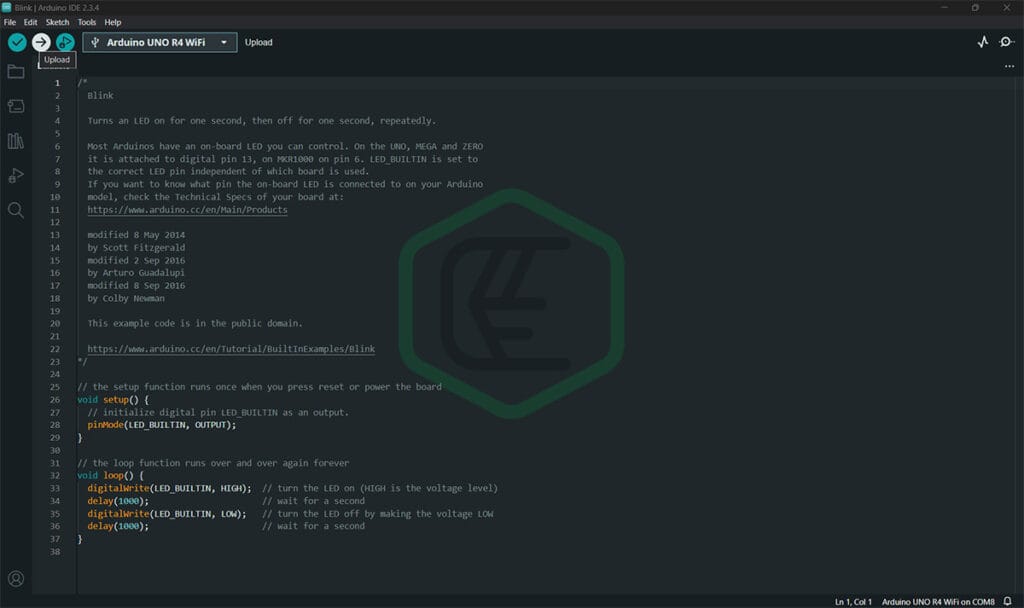
Now as we have prepared everything we can upload the simplest sketch og Blink LED. For this navigate to File -> Examples ->Basics -> Blink, a new window will open with the blink sketch. Now just click on the Upload Button on the IDE and within few moments code will be loaded on the board.
Advantages & Disadvantages
Advantages
- Improved Processing Power
- Increased Memory
- USB-C Connectivity
- Backward Compatibility: to older shields and sketches
- Enhanced Communication Options
Disadvantages
- Higher Cost
- Increased Power Consumption
- Learning Curve for Beginners
- Not Ideal for Simple Projects
Conclusion
The Arduino UNO R4 Series is certainly a major upgrade when compared to its predecessors, offering not only enhanced processing power but also more memory and connectivity options. New features introduced in it make it more powerful for complex and demanding projects that include industry-level performance and applications with a twist of Embedded Systems. However, its higher cost and increased power consumption make it somewhat difficult for beginners. Also, keeping in mind the learning curve, it is not recommended for simple projects.
Overall, whether the Arduino UNO R4 is for you or not depends on the project you need it for. If your project needs higher processing, more memory, and advanced features like Wi-Fi and Bluetooth, then R4 is an Excellent choice, but for simpler projects, I’d still recommend the UNO R3
FAQs
Q. Boards are not being detected on the Ports
Check the Device Manager or the USB devices attached to the system and make sure the USB is detected. If the device is detected but not correctly identified, there must be a driver issue. Make sure to check correct drivers are installed.
Q. Code not Uploading
If the code is not uploading, check the selected port and try again, also reconnect the board, which might also help.
Q. Are Arduino shields still compatible with R4?
Most of the shields are compatible, but there might be some exceptions; the common ones, like the motor shield and others, are compatible.
BONUS
if you want that HearBeat animation back to your UNO R4, below is the code just upload it and enjoy,
#include "Arduino_LED_Matrix.h"

ArduinoLEDMatrix matrix;

void setup() {
  Serial.begin(115200);
  matrix.loadSequence(LEDMATRIX_ANIMATION_HEARTBEAT);
  matrix.begin();
  matrix.play(true);
}

void loop() {
}