Hello Guys, welcome back to this learning and building platform, today, we’ll discuss about Pulse Sensor. It is a quite famous sensor for measuring heart rate and other stuff. Pulse Sensor has a very simple construction and simple output. But this sensor lags in precision, which is a necessary thing in every type of this sensor. However, in this price range, such precision in measurement is highly appreciated, so for more precision, you should use different variants of such sensors. Keeping things straight, let’s begin today’s topic.
What is Pulse Sensor
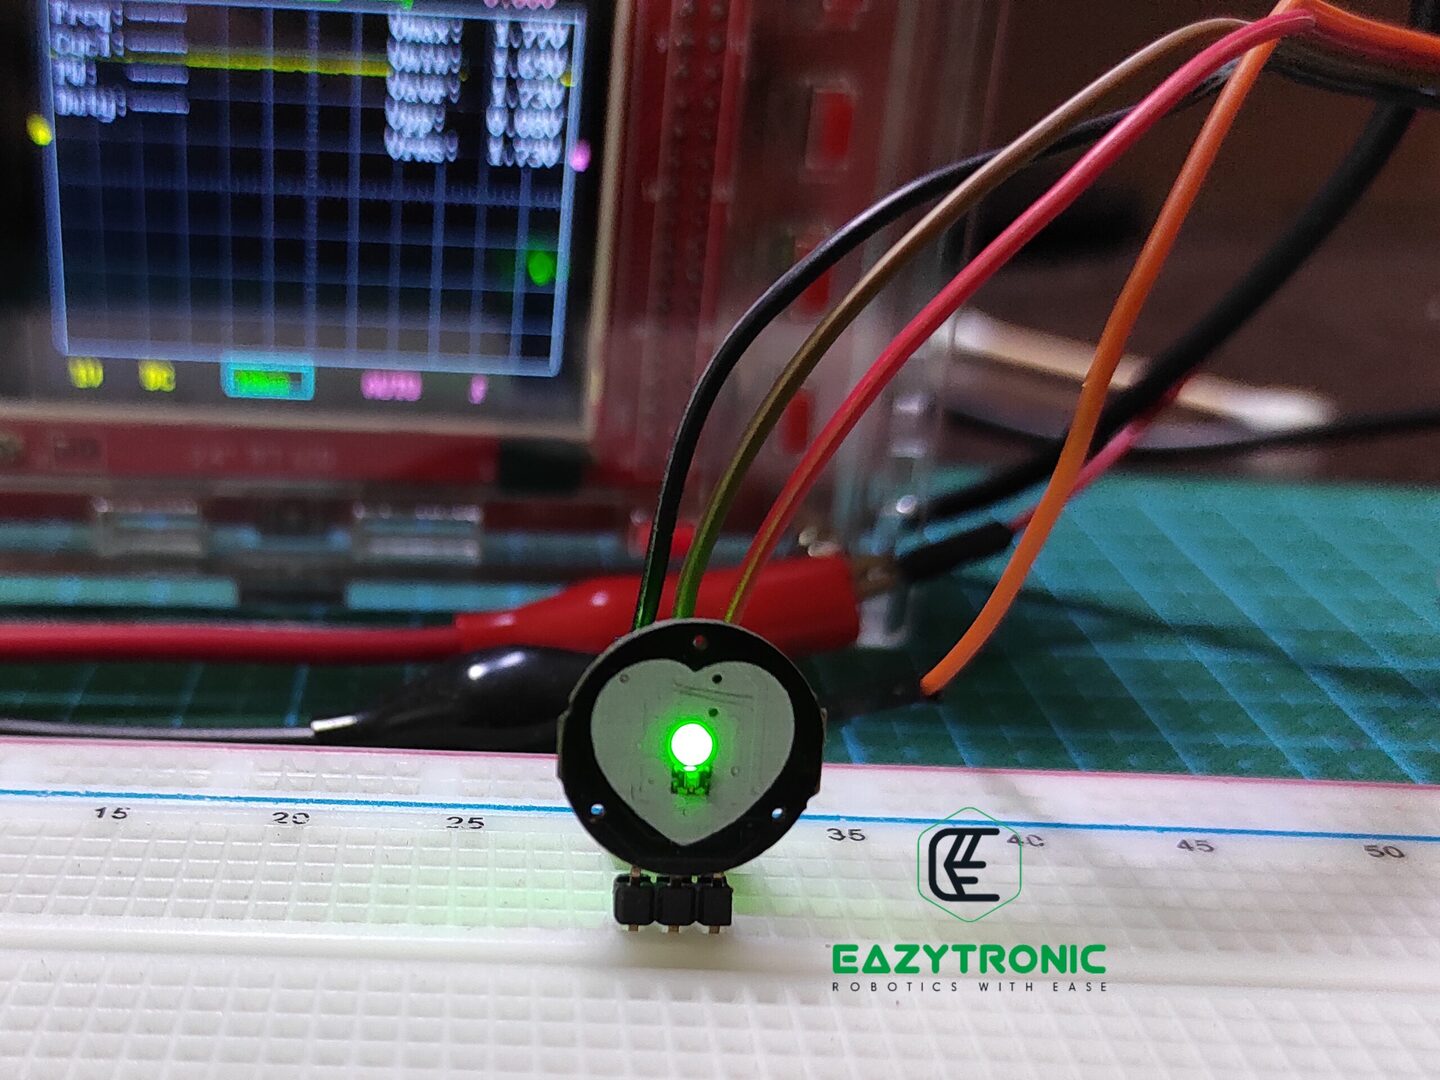
Pulse Sensor, this is the smallest DIY sensor that can e used to measure Heart Rate and other essential measurements. This sensor comes in a circular PCB which is comparably smaller than other sensors available. Furthermore, it was not originally a sensor developed by some company but a kick-starter that gained popularity and further developed into a famous pulse sensor. As it is the very basic version of the heart rate sensor, hence the quality we expect from this is acceptable.
It is very simple and easy to understand, also as it is open source, there is no issue with the schematic, and its authenticity. Most importantly, the heart rate sensor, or precisely we say particle measuring sensors, works on the principle of Photoplethysmogram. This is the method of reading the intensity of the emitted light by the sensor itself. In this method, a light source is used which penetrates light rays into the skin, up to the blood vessels flowing under the skin. A photodetector is fixed such that it detects the light reflected from under the skin.
Photoplethysmogram
This method is commonly known as PPG, in addition, it has a wide range of applications and is growing further. In this method, a light source with is typically either IR-LED or GREEN LED is used. Certainly, some devices use both types for a more accurate reading and noise filtration. The Light Source penetrates the beam of light into the skin, which reaches up to the blood tissue. The light gets reflected from the blood components and detected by the photodetector and then further processed.
The values received by the microcontroller depend upon the intensity of reflected light received by the photodetector. Hence, the quality of the sensor used and the type of light are very crucial, on the other hand, there are different uses for the different light sources. IR-LED value is usually used to measure the blood volume, while the GREEN LED is used to measure oxygen in the blood. However, there can be another light source that can be used depending on the requirement.
Advantages
- It is a cheap and easy-to-use sensor, which is very good for practice as a beginner.
- No issues of messy communication or communicating with registers, simple single pin output
- Small and compact PCB with adaptable logic level range.
Disadvantages
- Very poor accuracy and resolution.
- Repairability is highly tough as all components are not easily available and in the SMD package.
Price & Availability
Pinout of Pulse Sensor

- Vcc:- This is the power pin which is connected to microcontroller power pin, it has voltage tolerant upto 5V
- GND:- This is the ground pin which is connected to the common potential of the system.
- OUT:- This is the signal output pin which is connected to the Analog Pin of the microcontroller.
| Operating Voltage | 3.3V-5V |
| Current Consumption | 4mA @ 5V |
| Output Type | Analog output with pulsating signal |
| Output Voltage range | 0.3V to Vcc (input voltage) |
| Dimensions | Radius = 8.0 mm (approx) |
Schematic
Above is the schematic of the Pulse sensor, as this sensor is open source, hence the schematic is the original one. Moreover, all the files required to develop a similar one on a custom basis are provided on their official website, i.e., PulseSensor.com. However, I’ll explain the schematic here in detail, so let’s begin this. Firstly, in the schematic, you can see two ICs one is APDS-9008 & MCP6001RT these both are the main components of the whole sensor. In addition to it, other components together built up other important circuits which play crucial roles.
APDS-9008
APDS-9008 is the photodetector developed by Avago, used here to receive the reflected light and convert that into an electric signal based on the intensity of light. Detailed information is provided in the datasheet of the photodetector, which is attached above. It is a low-cost analog output ambient light sensor that comes in a miniature led SMD package. The input voltage range for this is 1.6V to 5.5V, however, it depends on the overall circuit input voltage range.
The sensitivity of ADPS-9008 is 565 nm peak to peak also there are some intensity v/s voltage graphs which lets you understand further. But these all measurements are done on the white light as the source whereas in Photoplethysmogram we use IR, RED, or GREEN light as a source. Unlike all other photodetectors, this one has 6 pins to provide overall structural support while using 3 of them. The light source plays a major role as it defines the intensity of light and wavelength received.
MCP6001-RT
MCP-6001RT is a Low power Op-Amp, it is used to convert the current for the photodetector to the appropriate voltage. Furthermore, the signal is followed by a Low Pass filter for output, which makes it ideal for the 3.3V logic level calculations. The positive power pin of the Op-Amp is protected by a reverse polarity protection diode, making the sensor less vulnerable to damage caused by a wrong connection.
In simple words, we can say that the current signal coming from the photodetector has noise and cannot be detected by the microcontroller. So, to resolve this, the signal is made to pass through the RC Low pass filter to remove the unwanted noise. Further, it is sent to the Op-Amp for amplification, then we get the required signal which is both clear and in the logic level range of the microcontrollers.
AM2520ZGC09—Light Source (Green)
It is the reverse mounted GREEN Led used as the light source for the sensor. It has a peak emission wavelength of 515 nm, which is under the peak limit of the photodetector. Its Input voltage range is 3.3V-4.1V, hence this limits the sensor input voltage to 3.3V. Along with this, it is also low power which draws about 50uA of current, hence it can be used in mobile and compact devices.
Working


Now, let’s discuss the main thing, the working of this DIY Kickstarter, which is very simple to understand. The sensor starts by turning on the light source, which actively emits GREEN light into the skin. Light rays penetrate the skin and reach the tissues, where there are channels of fine blood vessels. As stated above, different light sources react to different blood components so, it is essential to use the light source precisely. IR-LED & RED respond to the volume of flow of blood and are particularly used in calculating Blood Pressure. Whereas GREEN Led is used to calculate oxygen concentration in the blood.
Here, Green light gets reflected through the blood flowing through those blood vessels in blood tissue under the skin. Oxyhemoglobin which is the blood with dissolved oxygen absorbs the green light in a certain amount and the flow of blood together creates an oscillating signal. This oscillating signal is the resulting value, but still has some noise. Which is further filtered through an RC Low pass filter and further amplified by an Op-Amp.
We end our today’s discussion here, I hope you like my explanation and find it interesting. If you want to add any other information, then let me know in the comment section.
FAQ
Q. What is input voltage range and logic level of Pulse sensor?
Sensor can be powered with either 3.3V upto 5V. Logic level of the sensor is from 0.3V upto the Vcc or positive power input.
Q. How accurate is Pulse Sensor as compared to others?
In this price range it is quite accurate, however you mustn’t use this for any professional usage