
Hello hobbyist, welcome to another of the Basic Electronics section. Today we’ll discuss about Ultrasonic sensor, HC-SR04. The ultrasonic sensor is very famous for its wide range of applications but, here, we’ll discuss it from scratch. HC-SR04 is the best sensor for beginners to fix their hands on before reaching high-level projects. There are many projects and tutorials that can be done with HC-SR04, an Ultrasonic sensor. But before that, you need to have complete knowledge of this sensor, so let’s dig into it.
What is HC-SR04 Ultrasonic Sensor?
HC-SR04, Ultrasonic sensor is widely available in both online and online market at a reasonable price which makes them ideal to be used as beginner’s sensor. Apart from this, the operating code and usage are very simple, so there is no need for complex programs.
This sensor works on the principal of the reflection of the sound or phenomena known as ECHO. Technical details o this sensor ill be discussed further. This sensor is good for small DIY and less professional projects, but I wouldn’t recommend it use in some professional projects as there are many other similar sensors available in market. But there may be variation in the base model, so observe carefully.
HC-SR04 sensor works on the frequency of 40kHz, which lies under the ultrasonic sound spectrum. Also, the operating range of the sensor is around 4 meters i.e., 400 cm & 13 feet (ca. 396 cm) approx. The minimum distance which can be measured with this is 2-3 cm. Objects or any detection closer to this ill results in malfunction of sensor and incorrect distance values.
Ultrasonic sensors are of various operating voltage and reference voltage, but this one is ideal for usually all types of the development board. As it is 5V tolerant and delivers data up to a 5V reference point which is easily understandable by all boards and microcontrollers. But as all have some pros and cons, the cons of these types of sensors are that their values can be affected by natural factors like temperature, humidity, and others. To solve this, you constantly need to calibrate the calculating values.
Advantages
- It is simple to use and easily available in the market, so there is no issue like shortage or complex code to make it run.
- Voltage Reference is 5v which can be easily used with most of the microcontrollers and for those who need lower or higher you may use a Logic Level Shifter module (not needed in most cases).
- The overall build quality of the sensor is strong and durable which make it withstand rough condition also there are many attachments available in the market for mounting them onto the top of something.
- It is far more usable and better than the IR sensor, which neither returns the distance value nor and a wide range for measuring distance.
Disadvantages
- The main drawback of this sensor is that you cannot use many of these sensors at a time, as the number of pins required for these will sum up to most of the pins available (Arduino UNO & Nano)
- The speed of sound differs due to environmental factors, so there is some error in value, hence we need to calibrate the values for accurateness.
Price & Availability
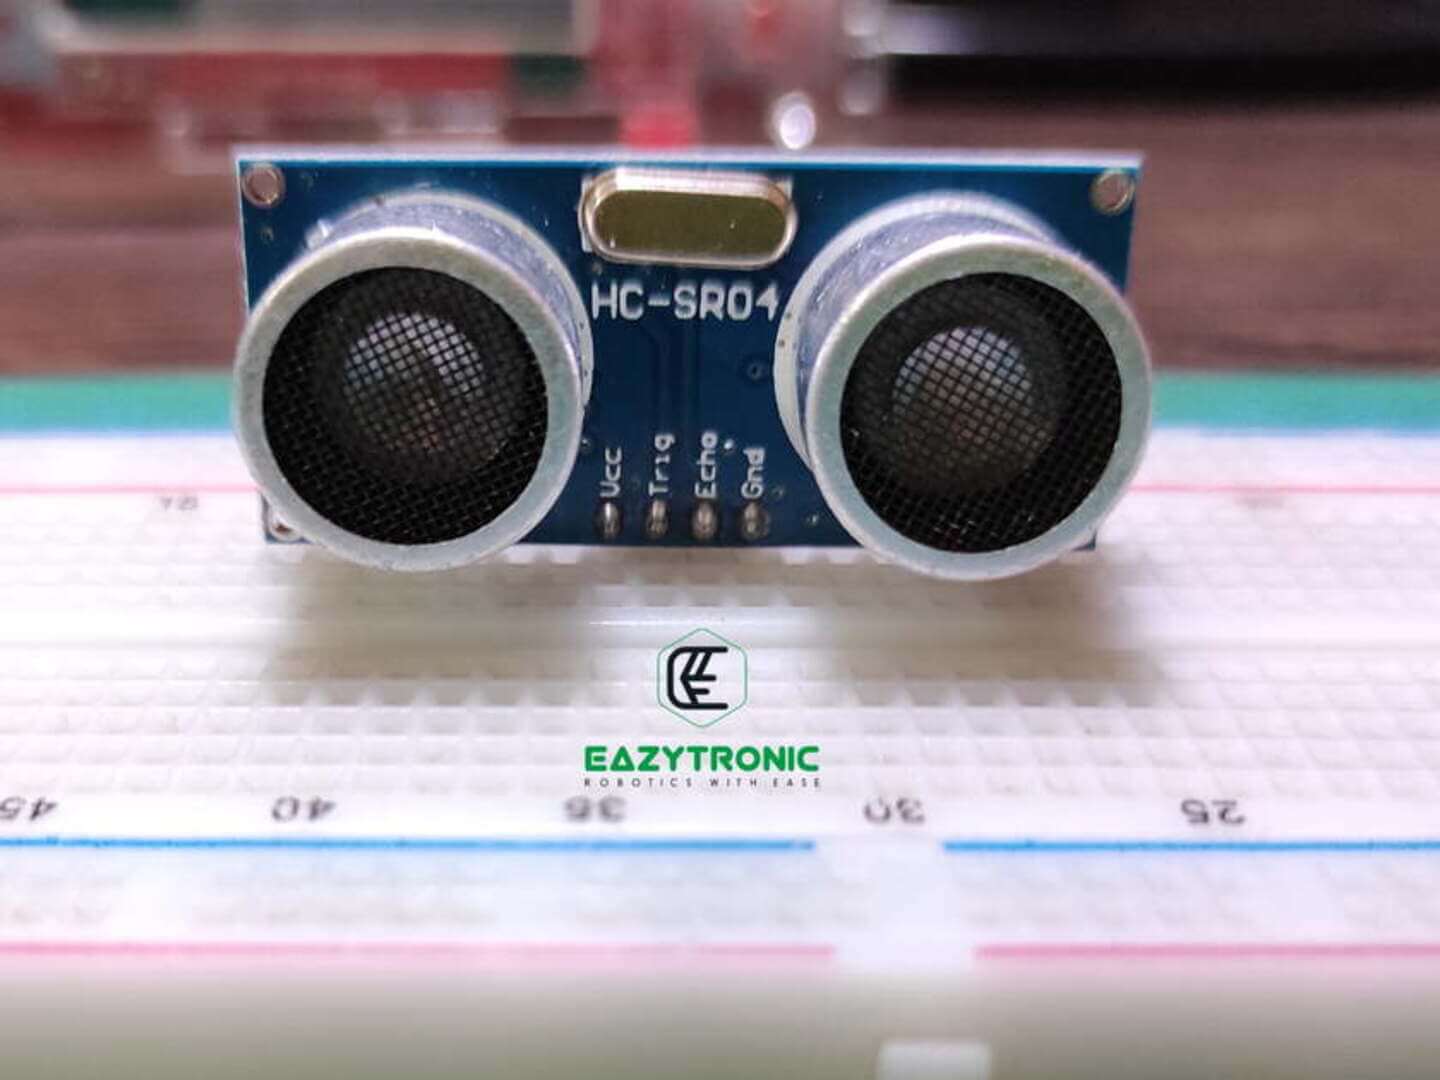
Pinout HC-SR04
Above is the image of the Ultrasonic sensor that I have so all the information will be regarding this model if you have 3 pin model then comment below I’ll add info regarding that also.
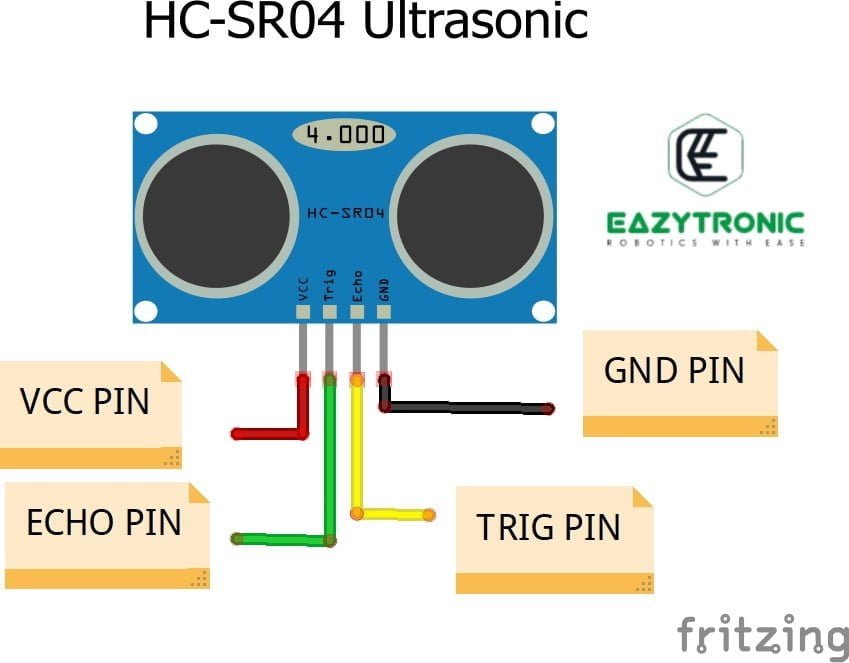
- Vcc:- This is the power delivery line or the high potential point, which can be powered up to 5 volts.
- GND:- This is the ground potential and must be connected to the common ground of the hole system
- TRIG:- This pin is used to receive a signal from the microcontroller or the amount of time in milliseconds to turn the transmitting transducer on.
- ECHO:- This pin sends the pulses data to the microcontroller pin, which is directly proportional to the time taken by the ultrasonic sound ave to strike the obstacle and return back and finally received by the receiving transducer.
Specifications of HC-SR04 Ultrasonic Sensor
| Operating Voltage Range | +5V DC |
| Operating Current | 15 mA (approx.) |
| Quiescent Current (Idle State) | < 2 mA |
| Field of View (Measuring Angle) | 15° (approx.) |
| Measuring Range | 2 cm – 400 cm (4 m / 13 ft) |
| Resolution/Accuracy | 0.3 cm / 3 mm |
| Trigger signal Pulse Width | 10µs |
| Physical Dimension | 40 mm x 20 mm x 15 mm |
| Operating Frequency | 40kHz |
Schematic
Above is the schematic of the HC-SR04, Ultrasonic sensor which is quite understandable, but this schematic is generated by me based on the information available on the internet. So authenticity of the correct diagram cannot be taken, it is for the purpose of learning and understanding things.
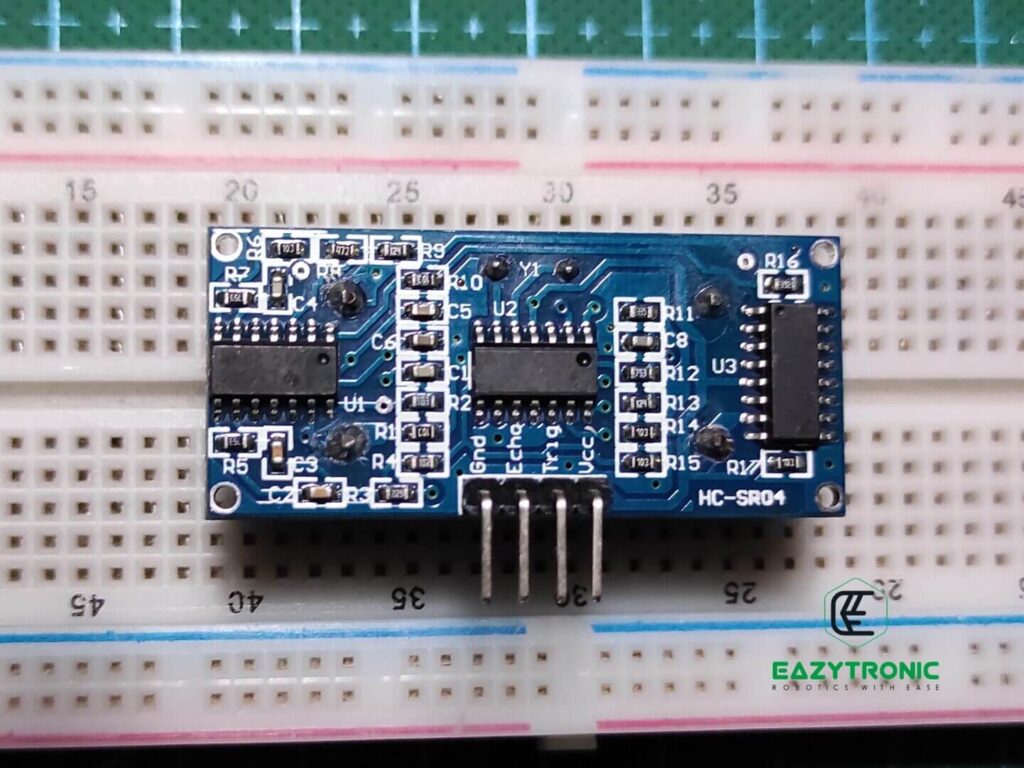
The 3 main components or IC which makes up the HC-SR04 Ultrasonic sensors. A EM78P153, 8-bit microprocessor which does all the main job. Datasheet or some related documents for this IC is rarely available with correct IC initials, so read carefully. Next is MAX232, which is used as a kind of Transmitter transducer driver to send pulses of ultrasonic sound. Lastly is the LM324, a quad channel Op-Amp.
In the above schematic, you can see there are various other components. Like, the most important parts are those two transducers that emit and receive the ultrasonic sound. These parts are built of a piezoelectric component and a cone-type membrane to focus the ultrasonic sound waves in a certain direction together packed in rather a complex form. Along with some passive components, it makes up the HC-SR04 Ultrasonic Sensor to measure distance.
Working of HC-SR04 Ultrasonic Sensor
Let’s now see how this all combination of IC’s and other components work together to form a complete, functional Ultrasonic Sensor. First, we connect power lines of the sensor to the microcontroller power pins. It is recommended either to use Microcontroller power pins or to a source which has power protection circuit so that the voltage doesn’t hype, or it’ll damage the sensor. Also make sure to connect the GND pins first of the sensor as it adapts to the common ground potential first to ensure any voltage hikes causing sudden damage to the sensor.
The whole process starts with making the TRIG pin of the sensor LOW for 2µs-5µs (depending on user preference). After this, make a delay and then make the TRIG pin of the sensor HIGH (5V voltage reference)for 10µs. This will give a signal to the EM78P153 8-bit microprocessor of the sensor to request the transducer driver to send 8 cycles of ultrasonic sound burst at 40kHz frequency. After this, the whole system (sensor) waits for the receiver transducer to receive the reflected ultrasonic sound burst.
If the receiver transducer receives the ultrasonic burst, it will make the ECHO pin from LOW to HIGH for an interval/pulse width of 150 µs – 25 ms. This interval/pulse width is directly proportional to the distance at which the ultrasonic burst strikes the obstacle and reflects back. If there is no obstacle, the receiver transducer will not receive any burst and hence make the ECHO pin from LOW to HIGH for an interval/pulse width of 38ms. This indicates that there is no obstacle within the range of 4 m (400 cm) hence the field of view is clear.
The received ultrasonic passes through a series of amplifiers and filters built of LM324 quad Op-Amp to make it in the reading or understanding range of the both microprocessor and the ultrasonic driver. This includes Amplifier, Bandpass Filter, Amplifier, & Comparator. These 4 make the incoming signal in the listening voltage range of the whole system.
Distance Calculations
Now let’s see the calculations for calculating the distance there are many libraries which you can use but as I have mentioned above that the speed of sound depends upon environmental factors. So you need to calibrate the speed of sound. For this, you need to use basic calculation like:
Distance = Speed x Time(s)
Or you can edit the existing library for making the speed of sound variable and should be initialized during the code. For this you need to stay tuned to upcoming article as I’ll myself edit the existing library to make those changes.
With this, we end this detailed explanation of the HC-SR04 Ultrasonic sensor, I hope you like it and if you need more information about it or any other requirement then comment down below.