

Hey Friends, I’m back with the MQ-3 Alcohol sensor with Arduino UNO, another interesting article in Arduino Series. This is part of MQ-XX series of sensors; each sensor detects certain smells or gases. There are demonstrations of all the MQ sensors on our website, search for the one you are searching for. The one we’re going to demonstrate today is to detect alcohol. This not only sees drinkable ones but also laboratory alcohol also. Hence, for testing, I’ll be using Isopropyl alcohol. So without wasting any time, let’s begin.
MQ-3 Sensor and Arduino in Brief
MQ-3 Sensor
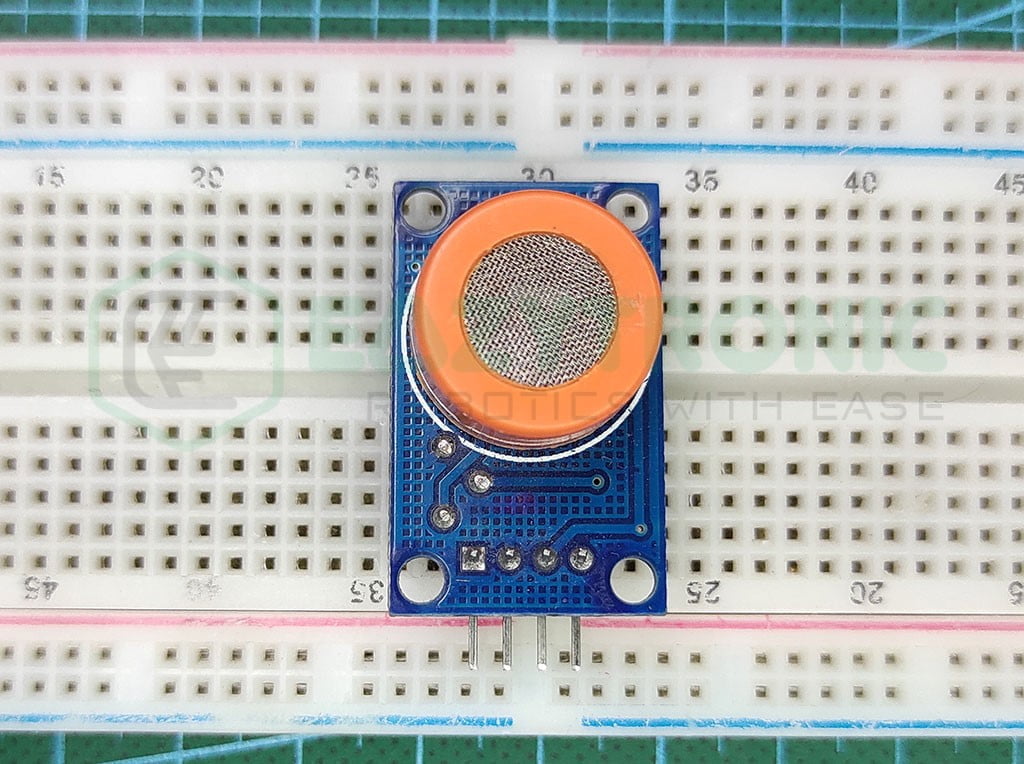
This sensor is one of the MQ-XX series of sensors, each detecting a different gas or smell. MQ-3 is an alcohol sensor that detects the presence of alcohol in the nearby environment. The sensor is all in size with a good sensitivity, hence you can place it anywhere in a compact space without any problem.
The Sensor’s main component is an orange-colored structure that encloses within itself a 6-pin sensing element. This element uses the heat generated from the sensing element. Further, it checks the resistance of the pins before and after the reaction with alcoholic air. Among 6 pins, two pins are used to drive the heater, and the other 2 out of 4 are used to check the resistance.
MQ-3 sensor is operated on a 5V supply with both types of output DIGITAL & ANALOG. However, the output for 3.3V tolerant pins of specific microcontrollers needs to be converted into respective ranges. The material used in making the element is SnO2 which detects the gas and changes the resistance of the SnO2 layer.
Lastly, the sensor can be easily replaced if the main sensing element is damaged due to some reason. However, it is recommended to change to a new sensor if you are a beginner to this.
Arduino UNO
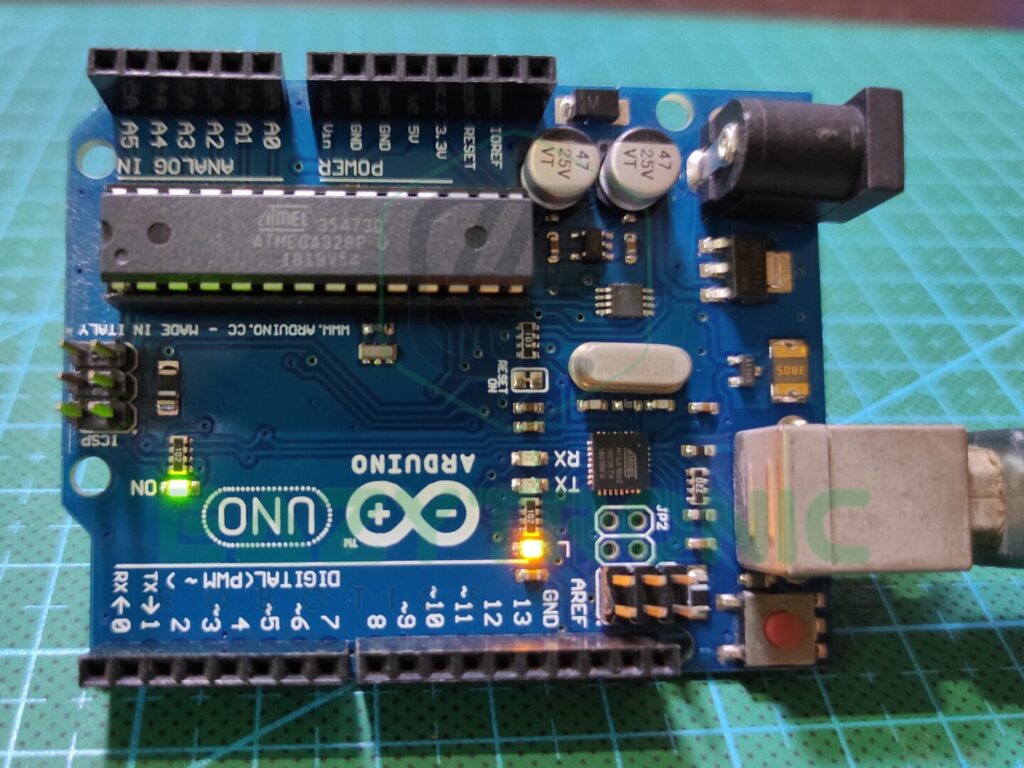
The most famous microcontroller among beginners is Arduino UNO. This development board is available in the market for a cheap price and offers quite sufficient features for a beginner to start with. The board is of perfect size and most of the components are DIP versions. Hence, offers a good chance of repairing it due to some mishappening.
Arduino UNO Board is built out of ATMEGA328PU IC, which is a DIP-28 Package microcontroller, as a main component of the Arduino UNO Board. It is an AVR-Based 8-bit CMOS microcontroller that can operate at 16MHz frequency. This speed is slow as compared to some other microcontrollers at similar range price points. But for a beginner, this is also very good and works flawlessly.
Next comes the Ram and storage section. Arduino UNO provides 2 KB of SRAM that can operate a large amount of data for most projects. It is paired with 32 KB of SPI Flash storage, that can be expanded with the help of external SPI memory. It also provides 1 KB of EEPROM Memory that can store data even after the board loses power until the user removes it.
Lastly, is the power and pins section. The Arduino UNO board provides a total of 23 I/O pins. This includes 13 digital pins that can be controlled via the code. Among these digital pins, there are 6 PWM pins that can also be controlled via code. Moreover, it also provides 6 Analog pins with a 10-bit resolution. Data communications like SPI, I2C, and Serial communications are also available.
The board provides both 3.3V and 5V of power supplies for different devices.
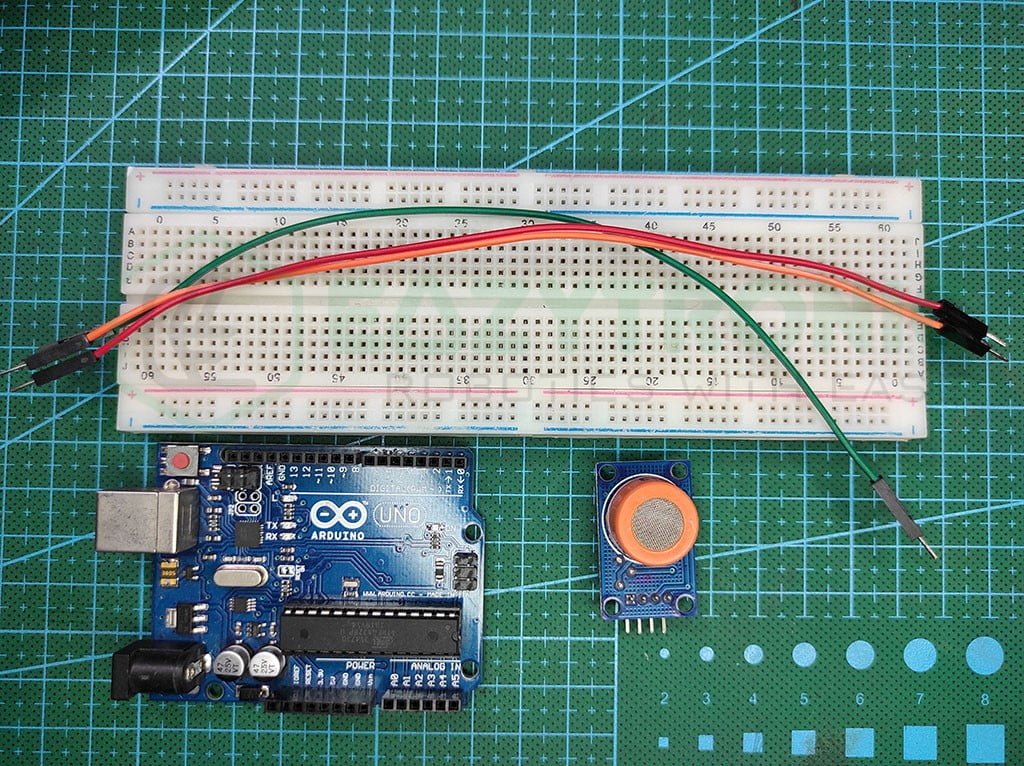
Material Required
- Arduino UNO
- MQ-3 sensor
- Breadboard
- Jumper Wires
- A system to program Arduino
- Some isopropyl alcohol, for demonstration purposes(in the care of some adults if used by a child).
Fritzing Schematic
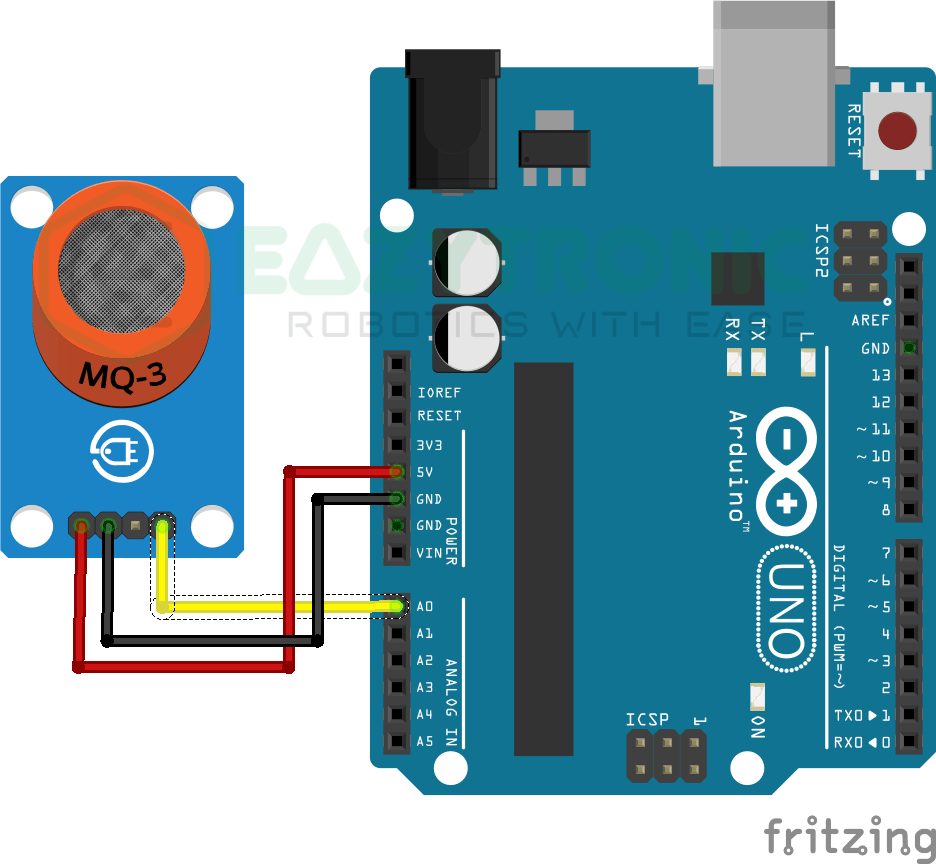
Wiring
| Arduino UNO | MQ-3 Sensor |
|---|---|
| 5V | Vcc |
| GND | GND |
| A0 | A0 |
Programming Arduino
This section is essential, as from here you’ll learn what you need to do to upload the program to Arduino UNO Board. But before that, you need to prepare your system by installing Arduino IDE. Arduino IDE can be easily downloaded from their website, just search Arduino IDE on Google. However, make sure to download the correct version for your platform. For complete detailed instructions, make sure to read the Arduino Introductory article. There I have explained from installing IDE to updating board definitions and libraries. Let’s proceed further.
Code
Below is the code for the Mq-3 Alcohol sensor with Arduino UNO. The code is tried to be kept simple and demonstrated in both ways, Analog and Digital. Copy and paste the suitable code for your application. But in both cases, make sure to read the explanation part.
#define mq3 A0
//#define mq3 3
//#define LED 13

 void setup(){
   Serial.begin(9600);
   pinMode(mq3, INPUT);
   //pinMode(LED, OUTPUT);
 }

 void loop(){
   Serial.println(analogRead(mq3));
   /*
   if(digitalRead(mq3)==HIGH){
     digitalWrite(LED, HIGH);
   }
   else{
     digitalWrite(LED, LOW);
   }*/
 }
The code above is merged into one while making the Digital section comment out. In the explanation section, I’ll explain each line and according to it, you can uncomment the line that you need. However, you need to save the code in both cases, so I’d recommend you save it with “mq3_arduino.ino“.
Explanation
Here comes the most anticipated explanation section. We’ll start with an Analog code explanation.
#define mq3 A0First, we define the pin to which we connect the Analog Out pin of the Alcohol sensor with the A0 pin of the Arduino UNO. You can also change the pins according to your choice, but for the most common example, I have taken it to be A0. Moreover, you can also store the pin in an int variable, but the define macro argument has its own plus point, those who know might get it.
void setup()
void setup(){
   Serial.begin(9600);
   pinMode(mq3, INPUT);
 }
In the setup section, as we do have not much to write, we’ll only be beginning the Serial communication and setting the pin mode for the pin to which the MQ-3 sensor is connected. The Serial communication runs at 9600 baudrate you can change the speed according to your wish. Also, if you want you can display this on any display, for the article on how to operate different displays can be found here.
void loop()
void loop(){
   Serial.println(analogRead(mq3));
 }
In the loop section, we only have to print the value that we’re getting from the sensor. For this, we have already begun the serial communication. Now to print the value, we just have to write the Serial.println(<value>);. In the code I have changed it a little, instead of value I have written the analog Read function. This function returns the value in the integer format. Therefore, we don’t need to store the value and give the board an unnecessary variable to store.
Digital Value Code Explanation
//#define mq3 3
//#define LED 13
Make sure to comment out these lines in case you’re copying it from here. In the first two lines, we define the pins on which the sensor and LED are connected. As we’re using the Digital value from the sensor, so we have to use the digital pin. For the LED, I have utilized the onboard LED on the Arduino UNO Board. You can change the pin and connect an external LED to your desired pin.
void setup()
 void setup(){
   //pinMode(mq3, INPUT);
   //pinMode(LED, OUTPUT);
 }
In the setup section, we don’t have to start the serial communication as we’ll be using the LED to indicate the presence of alcohol. For this, we must define the pin mode of the pins on which the sensor and LED are connected. For the sensor, we still need to define this pin as input while for the LED pin, you need to define it as output pin.
void loop()
void loop(){
   /*
   if(digitalRead(mq3)==HIGH){
     digitalWrite(LED, HIGH);
   }
   else{
     digitalWrite(LED, LOW);
   }*/
 }
In the loop section, we’ll be using the condition to check the status of the MQ-3 sensor. For this, I have used a simple if….else…. condition. We check if the signal coming from the sensor is high, then make the LED on pin 13 also HIGH. Whereas if the input from the sensor is LOW then make the LED also low. You can also set different statements in the if and else condition, as per your wish.
With this, we have completed the MQ-3 Alcohol sensor with Arduino UNO demonstration. If you need help in any section, then comment down below, and I’ll help you ASAP.