
Hey folks, I’m back with the Soil moisture sensor with Arduino UNO. This sensor is essential to practice, as many projects can be based upon this sensor. Although this sensor is easy to use, it has some limitations. Moreover, this sensor gives data that all microcontrollers can easily read. Also, the dual output makes it more flexible with different calculations. I have explained this in detail in a separate article here. One of the advantages of this sensor is that it can be easily made on a perfboard on a custom basis. With this, let’s begin today’s discussion.
Soil Moisture Sensor and Arduino UNO in Brief
Soil Moisture Sensor
This is one of the early sensors that I have laid my hand on to practice. Also, my first project was based on this. The soil moisture sensor is very readily available in both online and offline markets. Additionally, you can also build this sensor on a custom basis with all the DIP components without any issues. For this, read my detailed article for more information.
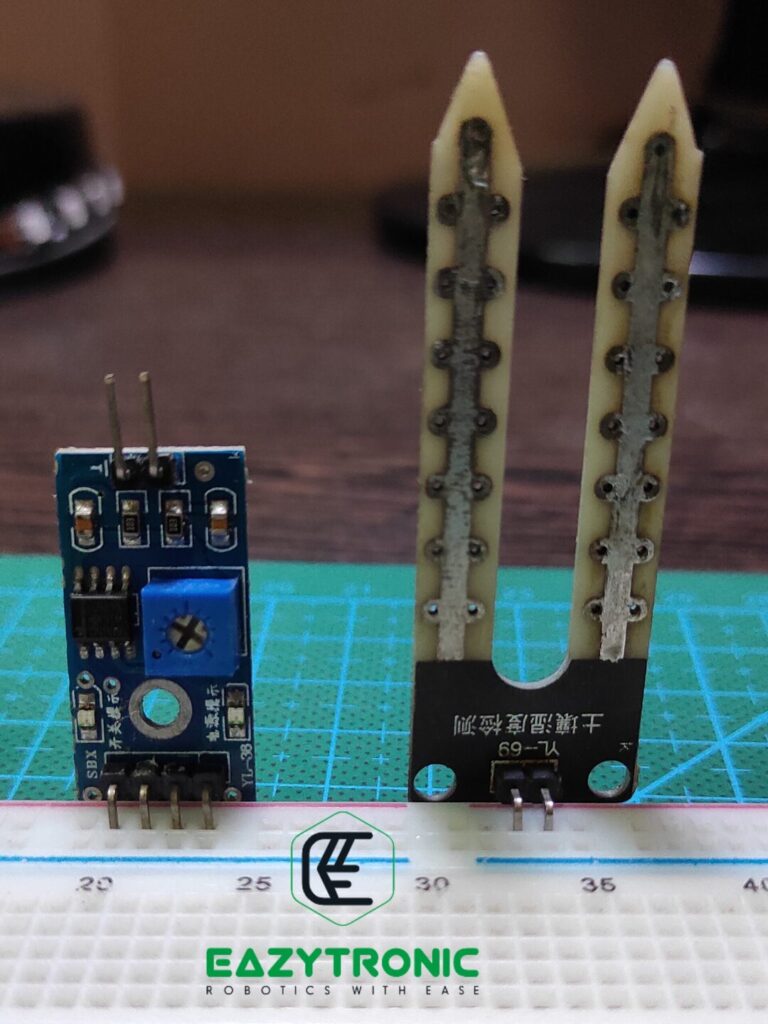
This sensor is based upon LM393 IC, which is an Low Offset Voltage Dual Comparator. This IC is responsible for the Digital output because for Analog output we don’t need this IC. However, it is advised to replace the IC if something goes wrong with the board. This IC along with several other passive components make up the complete module.
The Module comes in two parts, one of which goes into the soil to measure the content of moisture. The other part is the control board that converts that value into Analog and Digital Signals. The part that goes into the soil is shaped as a probe that detects the flow of ions through the soil. These ions are responsible for carrying charge, thus affecting the voltage signal passing from one probe to another.
This signal can be altered due to some factors like salt, pesticides, fertilizers, etc. Also, if the proof deposits layers of salt or corrosion, then also values can be influenced. The sensor is compatible with any microcontroller and works on the logic level that depends upon the input voltage.
Arduino UNO
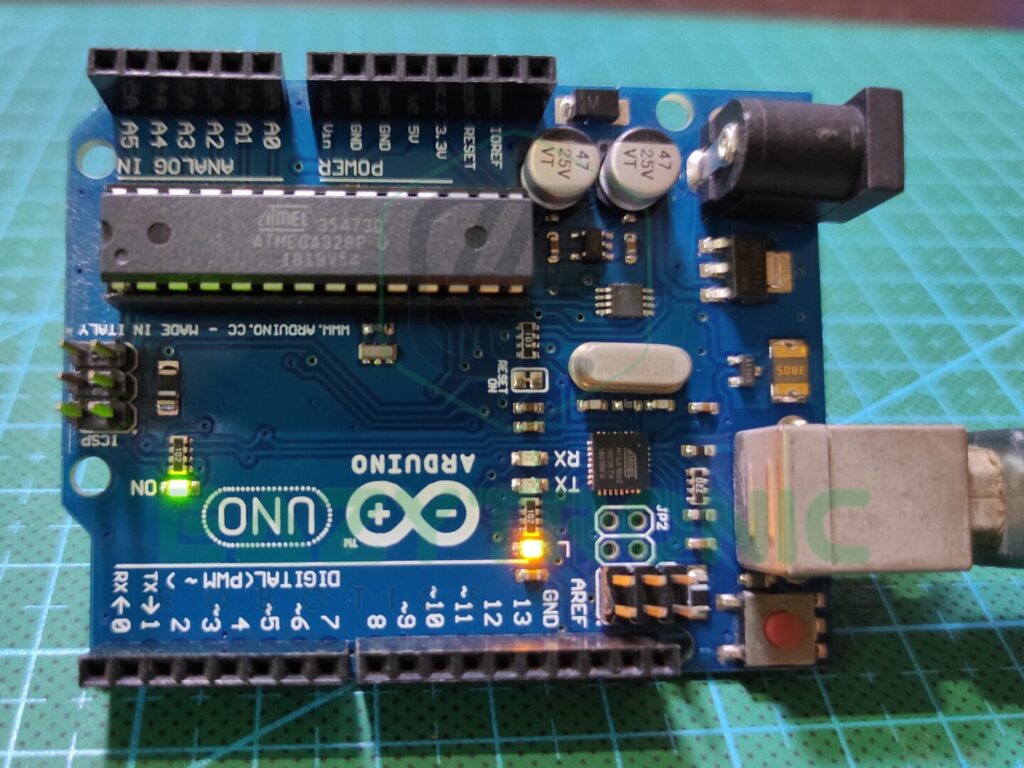
Arduino UNO is one of the best microcontrollers in the market at such a price point. Not only do these boards pack some good features, but also provide good durability and repairability. It is very easily available in both online and offline markets, and that too at a low cost. Moreover, the board can be repaired for small wear and tear.
The board is built upon ATMEGA328PU, which is a DIP-28 package IC that works as the main component of the board. You can easily replace this microcontroller very easily in case of any fault in the board. Also, you can store multiple programs on this board if you want. This is an AVR-Based 8-bit CMOS microcontroller that can operate at 16MHz clock speed.
Further, we discuss RAM and storage, which are also sufficient as other features. Arduino UNO comes with 2 KB of SRAM, which is paired with 32 KB of flash storage, which makes the perfect combination for a beginner board. Moreover, for some complete programs, it also includes 1 KBB of EEPROM Memory that can store data permanently.
Lastly, we take a look at the pins provided on this board. This board comes with a total of 23 I/O pins that can be programmed according to the user’s wish. This includes 13 digital pins, among which 6 PWM pins can be controlled via code. Also, it gives 6 Analog Pins with a resolution of 10-bit, which is great for practicing for beginners. Moreover, it provides output for both types of power, i.e., 3.3V and 5V.
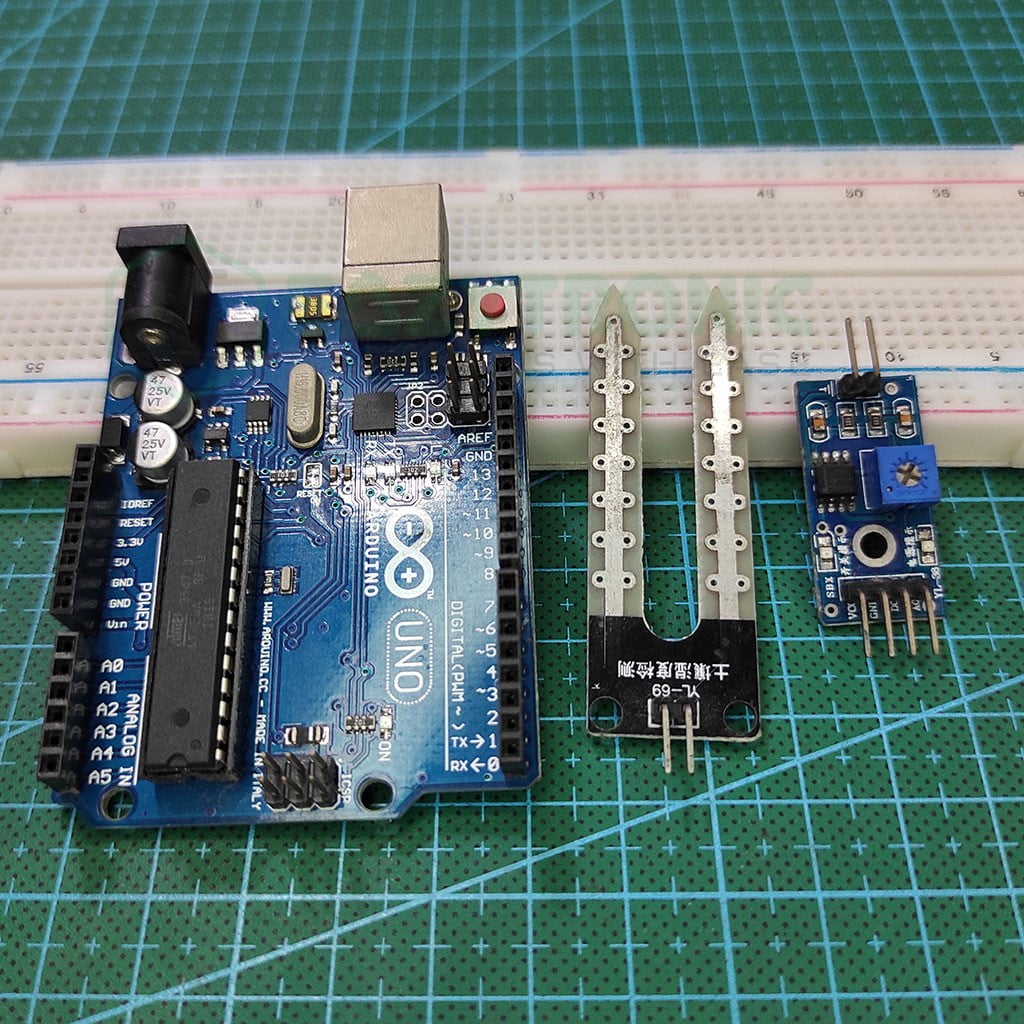
Material Required
- Arduino UNO
- Soil Moisture Sensor
- Breadboard
- Jumper Wires
- A system to program Arduino board
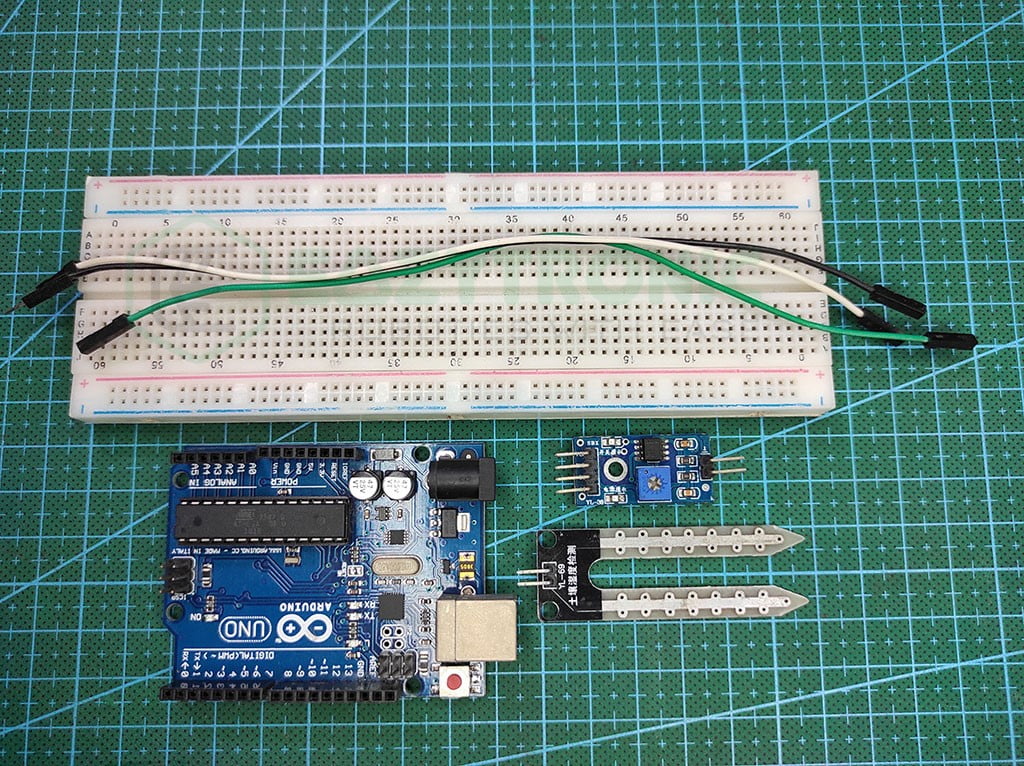
Fritzing Schematic
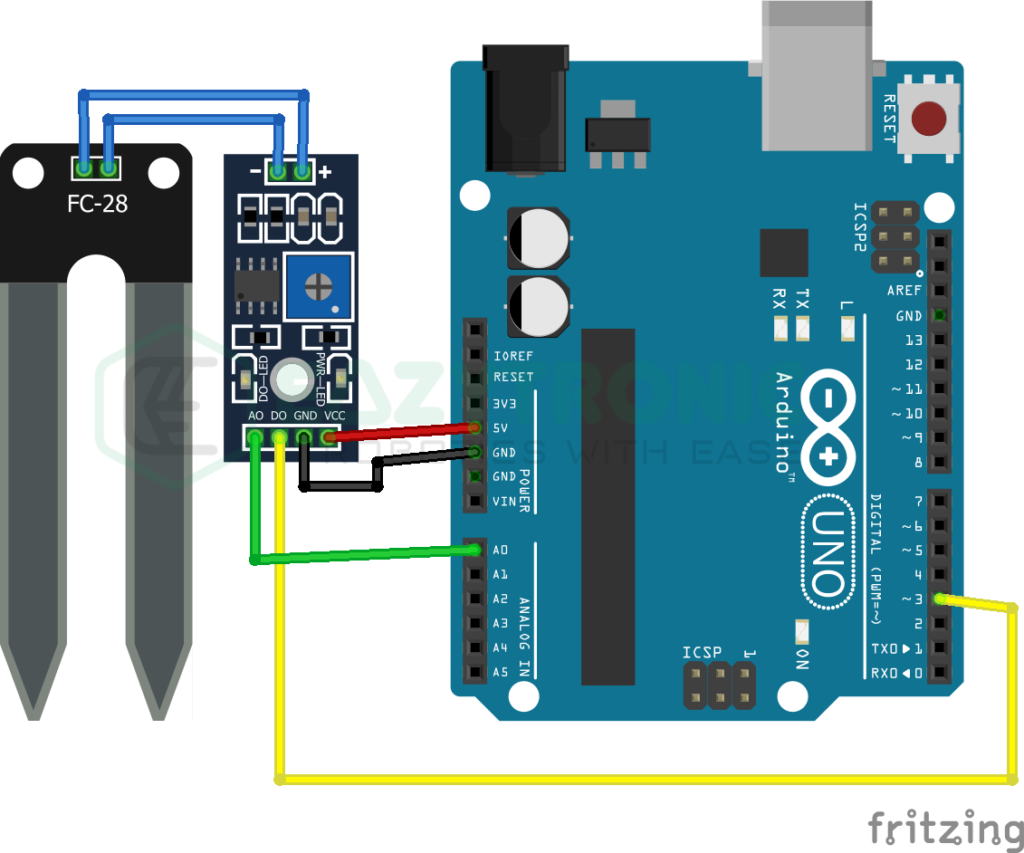
Wiring
| Arduino UNO | Soil Moisture Sensor |
|---|---|
| 5V | Vcc |
| GND | GND |
| D3 | DO |
| A0 | AO |
Programming Arduino
Once you have completed all the steps mentioned above, you can now start preparing for uploading the code. But before that, make sure to download the Arduino IDE from the official website. If you have already downloaded it, then update it to the latest version. Moreover, make sure to either download or update all the libraries and board definition, whichever condition apply to you. However, to make this easy, I have made an introductory article on the Arduino IDE. Also, if you want to know more about the Soil Moisture sensor, then read its detailed article here.
Code
The soil moisture sensor gives both types of output, so make sure to pick the correct code from below. Both codes are mentioned below. Also, the explanation for both codes is separately explained below in the explanation section. For the status of the sensor, I’ll be using the onboard LED. You can use any other ways like displaying something on displays of various types.
#define sm 3
#define LED 13

 void setup(){
   pinMode(sm, INPUT);
   pinMode(LED, OUTPUT);
 }

 void loop(){
   if(digitalRead(sm==HIGH){
     digitalWrite(LED, HIGH);
   }
   else{
     digitalWrite(LED, LOW);
   }
 }
#define sm A0
void setup(){
pinMode(sm, INPUT);
}
void loop(){
Serial.println(analogRead(sm));
}The above codes mentioned are for both types of output. But, make sure to save the codes with meaningful names, like for digital and analog codes respectively, “soil_moisture_d.ino” & “soil_moisture_a.ino“. You can also save them with any other name but make sure not to use any space in between the name or there’ll be an error in saving.
Explanation
Explanations for both types of codes are mentioned below respectively. To read the specific part, head over to the one you want to read. We’ll first start with the digital output code.
Digital code
#define sm 3
#define LED 13
We first start with defining pins for the sensor and the LED for displaying the status of the sensor. As we’re using the digital output from the sensor, we’ll be using a digital pin to read the incoming value. You can choose anyone from the 13 variables on Arduino UNO.
Also, we’re using the onboard LED for displaying the status, you can select other pins but make sure to use a resistor to limit the voltage for the LED. Moreover, you can use this signal to do some other tasks like display it on displays of several types. To declare the pin, I have defined a macro argument instead of declaring a variable to store.
void setup()
void setup(){
   pinMode(sm, INPUT);
   pinMode(LED, OUTPUT);
 }
In the setup section, we define the pin types to the controller to understand what type of device is attached to it. However, if you are using some other sensor with this, you need to start some other communications and pin modes. The syntax to define the pin types is pinMode(<pin>, <type>). The pins types can be assigned as INPUT, OUTPUT & INPUT_PULLUP.
For the Soil moisture sensor with Arduino UNO, we either need an analog or digital pin. In the distal section of the code, we define pin 3 as the input for the soil sensor. As for the LED, pin 13 which is the default pin for onboard LED is used. As mentioned previously, if you have used any other pin, make sure to change it the same.
void loop()
void loop(){
   if(digitalRead(sm==HIGH){
     digitalWrite(LED, HIGH);
   }
   else{
     digitalWrite(LED, LOW);
   }
 }
This is the main loop for the code. The code here will iterate, continuously, without any pause except if any error occurred. Here, I have used the simple code to just turn the LED ON or OFF according to the INPUT from the Sensor. You can choose to do something else for this, just replace the line highlighted above.
We start the section with an if statement that reads the input from the sensor and compares it with the condition mentioned. You can choose to first store the value in a variable for future use, but I don’t have any further need in this code, hence not done.
Then for the task to be done, a digitalWrite(LED, HIGH) line is used you can change it with something else according to your need. This line turns the onboard LED on. The following statement, i.e., else statement, turns the LED OFF in all other cases.
Analog
In the analog code for the Soil Moisture Sensor with Arduino UNO, we need a different loop section. All the other sections will remain the same with some minor changes.
#define sm A0We start the code by defining the pin for the sensor. The pin we’re going to use in this case of Analog type. Therefore, make sure to keep at least 1 analog pin free for this purpose. Also, if possible, make sure to either isolate the signal wire with the power line or make it run in parallel to the GND wire.
The pin we have used here is A0 pin that reads the signal from the sensor’s analog pin. You can choose any pin from A0-A5 depending on the board you are using. I have used define macro argument to declare the pin instead of using an int variable to store the pin.
void setup()
 void setup(){
   pinMode(sm, INPUT);
 }
In the setup section, we define the Analog pin only, as we don’t need to show the status via LED. Instead, we’ll be using Serial Monitor to print the values from the sensor. For this, define the pin as the same as in the digital code case. Also, if you wish to display the values on something else like an OLED display or LCD, then make sure to carefully merge both codes.
void loop()
 void loop(){
   Serial.println(analogRead(sm));
 }
The loop section is also as simple as the setup section, we’ll be using the Serial monitor to print the values from the Soil Moisture sensor. You can also add more lines of code based on the peripherals you want to connect to the project. Also, you can upload this value to a server for further steps of Smart irrigation.
With this, we have completed a demonstration of the Soil Moisture Sensor with Arduino UNO. If you face any issues, write them down in the comments. I’ll explain and solve it ASAP.