
Welcome back guys, Today we’ll about Getting Started with Raspberry Pi. Raspberry Pi Boards are common as the most affordable SBCs. SBC refers to Single Board Computer, also there are various models which provide great choices for the use. Over the years there are many series of Raspberry Pi Boards which we have seen from Raspberry Pi Zero to the current Pi 4. Setting each series is the same, just a couple of things get to change. However, in this article, we’ll be using Raspberry Pi 4B(4 GB) & Pi 3B+ for demonstration. So let’s begin!!
What is Raspberry Pi
Raspberry Pi is the most popular and common name in the field of SBCs. It’s not like there aren’t any other boards there, but these are quite common and therefore mostly used. All the series including the latest microcontroller Raspberry Pi PICO is developed by the Raspberry Pi Foundation. It is a UK-based Charity Foundation that believes in delivering education to young people in the field of computer science. Therefore, the Foundation is open source and has excellent support on various platforms other than its official website.
There are many versions of Raspberry Pi Boards and with time these are also advancing. So to ensure the updated trend continues, we’ll be giving information about all the boards so far. Raspberry Pi Boards are single Board computers that are not as good as a desktop machine, but decent in terms of computing. Moreover, these boards are used by many hobbyists for projects. In addition, these are used in making AI-based robots, as it has all the capabilities a computer for purpose needs. Most importantly, these can fit both in your pocket and budget. Hence, If you are searching for affordable SBCs, then just go for it.
Specification of Raspberry Pi series boards
In this section, we’ll be discussing the specification of each series of boards. Also, there will be a side-by-side comparison between them. Furthermore, all the GPIO and other parts-related information will be discussed in further parts.
Raspberry Pi Zero
This is the first version of Raspberry Pi Series Boards, and indeed the least powerful. It has a BM2835 processor, which is a 1GHz Single core CPU. In addition to this, it is paired with 512 MB of RAM. This configuration might remind of Windows XP to some people. Moreover, for display output, it has a micro Mini HDMI port, which is not very popular these days. Also, it has a micro OTG port which along with an additional converter can connect to USB devices. Overall this board is the smallest, or we say compact of all series.
The rest of the things that are still there in other versions, or more preciously these are surely advanced but still there. GPIO PIN Header that can be used to connect HAT devices, also these can be used to hook up other sensors and devices separately and for power delivery. Composite video and reset header and CSI Camera Connector (V1.3 only). Lastly, there are 3 versions of Raspberry Pi Zero namely Raspberry Pi Zero, Raspberry Pi Zero W, and Raspberry Pi Zero 2 W. With time these lost their popularity, yet these are used sometimes.
Raspberry Pi 1
This is the second version in the series and is somewhat more powerful than Pi Zero. There is no change in the CPU and RAM, but some other minor changes as compared to Pi Zero. Firstly, GPIO Pin headers increased to 40 in total, which gives more connectivity to sensors and other devices. In addition to this, a redesigned form factor is neater in comparison with the Pi Zero. As a result, all the connectivity ports like USB and Composite video ports are shifted to the edges of the Board.
Moreover, the SD Card slot is replaced with a new and nice-looking one, i.e., the push one. Also, they enhanced the Audio decoder circuit, which can decode more efficiently due to the low noise power supply. Lastly, they also redesigned the power circuit now consumes less power as compared to PI Zero and A, B models. In contrast, there are two models A+ & B+ which are different from each other in some aspects but not like the modern ones.
Raspberry Pi 2
Pi 2 is another series of boards, and it has certainly changed the future for its successor. This board comes with a Quad-Core ARM Cortex A7 CPU with a clock frequency of 900MHz. In addition to this, it is paired with 1 GB of RAM, which is double that in PI Zero. Another major thing is the connectivity ports, unlike Pi Zero it has USB Type-A ports, an Ethernet port, and finally a full-sized HDMI Port. Though this seems similar to Pi 1 indeed it is advanced from that version.
Moreover, all the other factors like GPIO pins, Audio section, and power section are similar to Pi 1. However, in the future version, they changed the Power delivering IC that provides the board with different power voltages like 3.3V, 1.8V & 5V. Until this version, PAM2306AYPKE, this IC is easily available and does not require any signal from the CPU in its work. But in the upcoming version, it is replaced with another rather complicated one.
Raspberry Pi 3
This is one of the most common versions still used despite the latest one and still can handle tons of computing without any issue. Raspberry Pi 3 comes in 3 versions A+, B & B+, the difference between the three is mentioned below. Version A+ comes with a 1.4 GHz Broadcom BCM2837B0 Cortex-A53(ARMv8) 64-bit SoC CPU. Paired with 512 MB of LPDDR2 SDRAM. This configuration is a bit unsatisfactory as it only has 512 MB of RAM, which might be insufficient for some tasks.
Furthermore, version B comes with Quad Core 1.2GHz Broadcom BCM2837 64-bit CPU. It is paired with 1 GB of RAM, which is kind of accepted. Lastly is version B+ which comes with the same CPU i.e., Broadcom BCM2837B0, Cortex-A53 (ARMv8) 64-bit SoC @ 1.4GHz. In addition to this, all three versions come with Wi-Fi and Bluetooth BLE, along with a full-sized HDMI port. You can also see a 40-pin GPIO header and composite video port along with CSI & DSI connector for the Camera and Touch Display.
Raspberry Pi 4
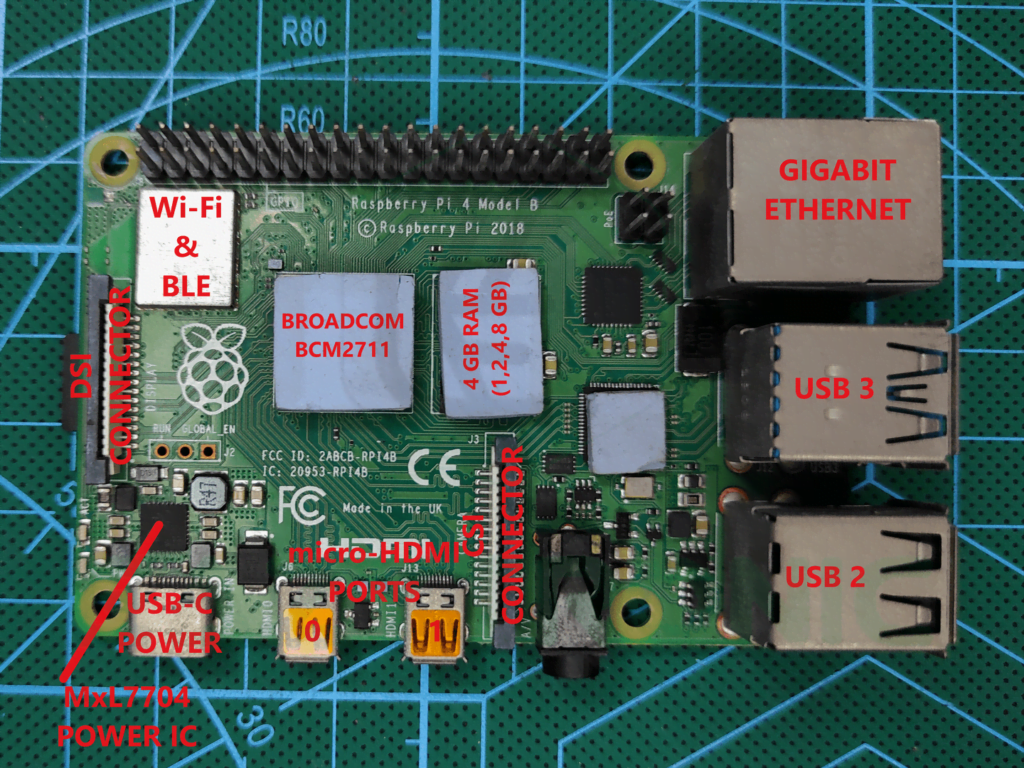
This is the latest version of all versions and the most demanding of all. The reason these are in demand is because of the variable RAM available in them. It comes in two variants, namely Pi 4B and Pi 400. Pi 4B comes with Broadcom BCM2711, Quad-core Cortex-A72 (ARM v8) 64-bit SoC @ 1.5GHz which is insanely good among all. Moreover, it is paired with different RAM choices 1 GB, 2 GB, 4 GB, 8 GB LPDDR4-3200 SDRAM. Now, this is something interesting, in this version you can have your choice of RAM. I have a 4 GB variant and is quite good in almost all functions.
In addition to this, it has 2.4 GHz and 5.0 GHz IEEE 802.11ac wireless, Bluetooth 5.0, and BLE with a Gigabit Ethernet port. Also, USB 3.0 & USB 2.0, 2 of each type, along with a full-sized 40-pin GPIO PIN Header. Furthermore, it comes with 2 micro HDMI ports that are capable of delivering an independent display signal simultaneously supported up to 4K 60 FPS. CSI and DSI ports along with composite video and stereo audio ports are similar to Pi 3. Pi 400 is similar to Pi 4B, but in combination with a keyboard connected to one of the USB ports.
GPIO PIN Header
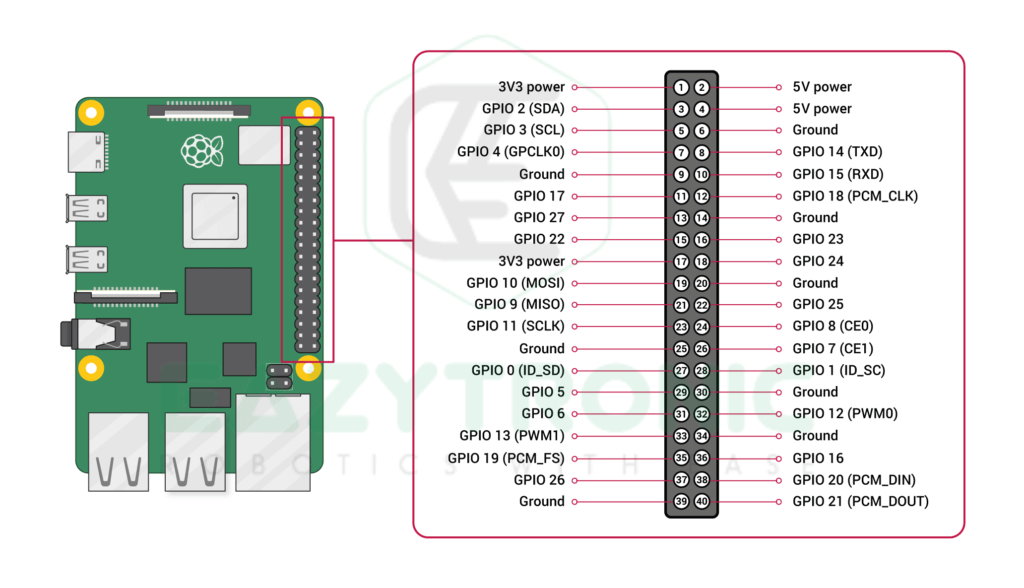
This is another important section of the Pi boards. GPIO pins are the main part of any microcontroller for connecting various peripherals. In Raspberry Pi Boards, there are 40 pins available for this function. There are numerous GPIO pins available along with the power pins. 2, 5V & 3.3V pins each, and 8, GND pins are available in GPIO Headers. Out of these pins, both 5V pins can be used to deliver power to the board from an external power supply. Don’t ever connect the 3.3V pin to an external power supply or the 5V pin, or you’ll blow up your board.
Moreover, there are around 28 GPIO pins that you can control for different operations. Along with this, these pins can also be used for different communication, which will be discussed further. The pinout of the and board dimensions of each board can be found below. Furthermore, are the pinout for different communication but like Raspberry Pi PICO the pins are only3.3V tolerant. Don’t ever connect pins to 5V, or you’ll blow up your board and then enjoy it. Hardware PWM PINS are GPIO12, GPIO13, GPIO18, and GPIO19, however, all pins can be programmed as PWM via software.
Power
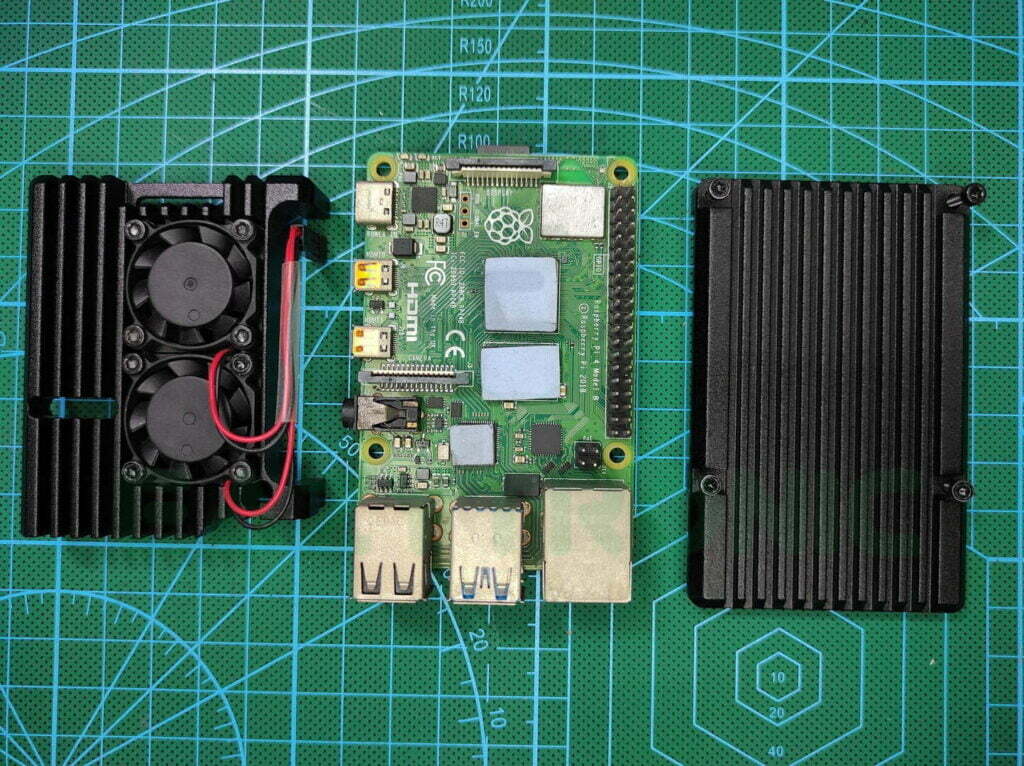
The Board can power with an adapter or any external power supply with recommended power supply of 5V @ 3Amp. This can be reduced to 2.5Amp if USB devices connected to pi didn’t take up much power. Otherwise, a lighting symbol will appear on the top right of the screen indicating low power, resulting in the sudden shutdown of the board. Now comes the power controller chip or IC. In earlier versions like Pi Zero, Pi 1 & Pi 2 the chip used is PAM2306AYPKE, this is a rather simple IC, but the modern one is a headache.
In recent boards there is a new chip MxL7704, this IC is a headache as replacing them is seriously not a solution. From my experience, once I accidentally blew up my Pi, I order a replacement IC from AliExpress. I tried to replace it, with two spare ones but none of them work, finally, I gave up and purchased a new board. On further reading, I came to know that it used I2C communication with the CPU to enable the chip, and re-balling the CPU is not a simple thing. Due to this issue, several clones of the board are made with the previously used IC that is easy to replace.
I2C
I2C communication can be used on Raspberry Pi. the logic level of the Board is 3.3V, the same for the I2C communication.
| PIN | I2C | EEPROM (PI 4) |
|---|---|---|
| SDA | GPIO2 | GPIO0 |
| SCL | GPIO3 | GPIO1 |
SPI
SPI protocol is considered as the fastest protocol among all, there are 2 SPI ports that are mentioned below
| PIN | SPI0 | SPI1 |
|---|---|---|
| MOSI | GPIO10 | GPIO20 |
| MISO | GPIO9 | GPIO19 |
| SCK | GPIO11 | GPIO21 |
| CE0 | GPIO8 | GPIO18 |
| CE1 | GPIO7 | GPIO17 |
| CE2 | – | GPIO16 |
UART
This is the serial interface used to communicate with serial devices like GSM. There is only one port available for this communication. TXD(GPIO14), RXD(GPIO15).
Setting Up Rspberry Pi
Hardware Required
There are few things that are needed to set up Raspberry Pi.
- Raspberry Pi 4B or 3A+/B/B+ (Preferably PI 4 4 GB for stable run environment).
- 5V @ 3Amp Adapter with USB type-C or micro-USB (Depends upon your board).
- Micro-SD card minimum of 16 GB
- Keyboard & Mouse
- Display with HDMI input or converter
- Internet connection
- Working machine (preferred Windows)
Preparing SD card
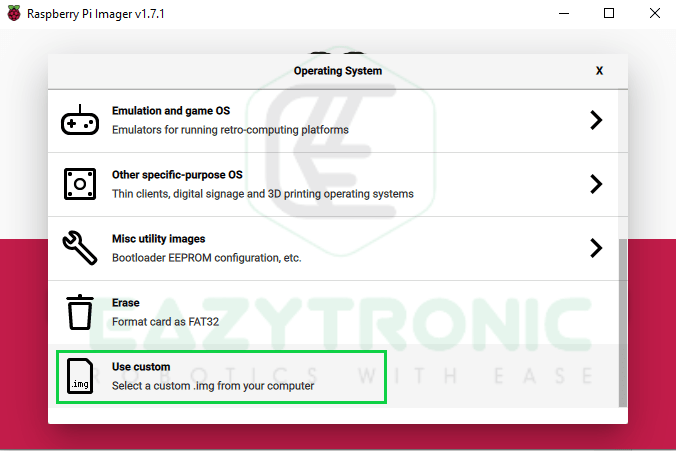
For preparing the SD Card, you need to have an SD card reader for connecting it to a computer or laptop. After this, you have to download the Raspberry Pi Imager from their official website. You can also install the different OS, as I have done. But before that, those who need to install the official Raspbian OS can directly download it from there. Below are the images of the interface you would see and the steps on how to install the OS.
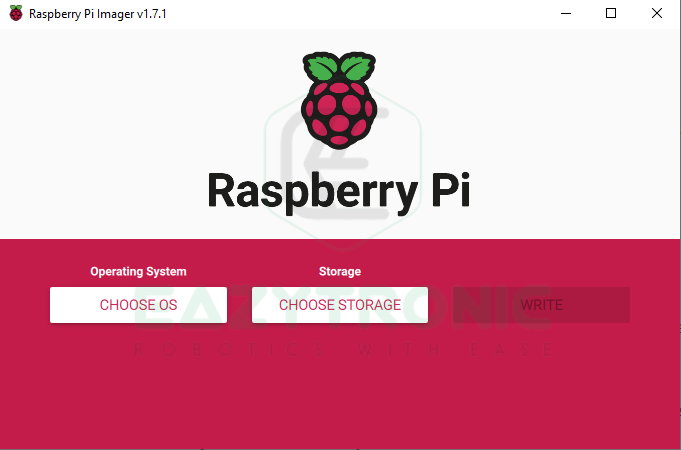
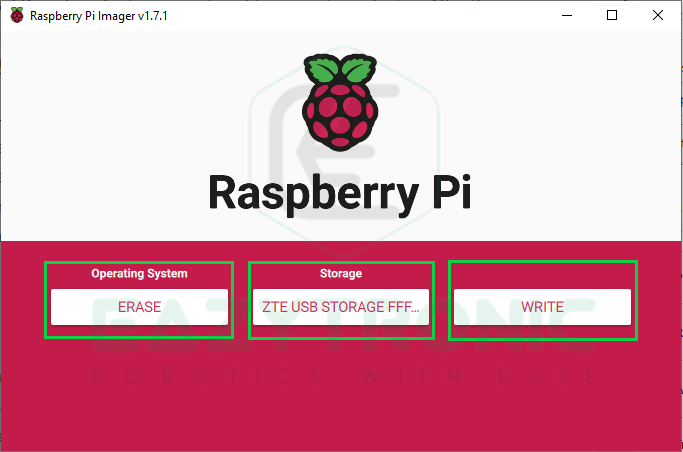
First, you need to install the Raspberry Pi Imager and open it. Upon opening, an interface similar to that shown up will appear. Now connect the SD card with the card reader, and select the drive that belongs to your SD Card. Make sure to select the correct one, or else you’ll do something fishy. Jokes apart, after this now from Choose OS drop-down menu, scroll down and select Erase. This’ll format your SD Card in the desired way, and it’ll be ready to install the OS.
Downloading Custom OS
For installing the custom OS on your Pi Board, you need to see its compatibility first. I have installed Twister OS and Kali Linux, and both are good and stable. Each of them has a different interface and features, so the choice purely depends on you. The official website for downloading the software is mentioned below. Also, you can find many other supported OS on the berryboot website.
To download BerryBoot OS images, you can look up this website. But before this, go to the previously mentioned one to install the main installer. After this, select your desired OS and just install it.
Installing OS
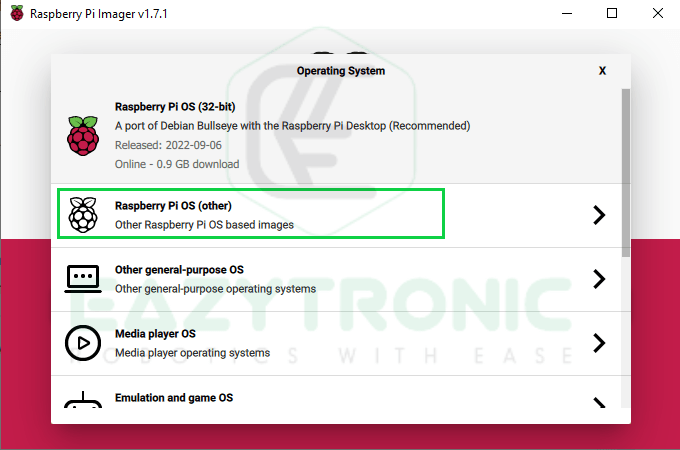
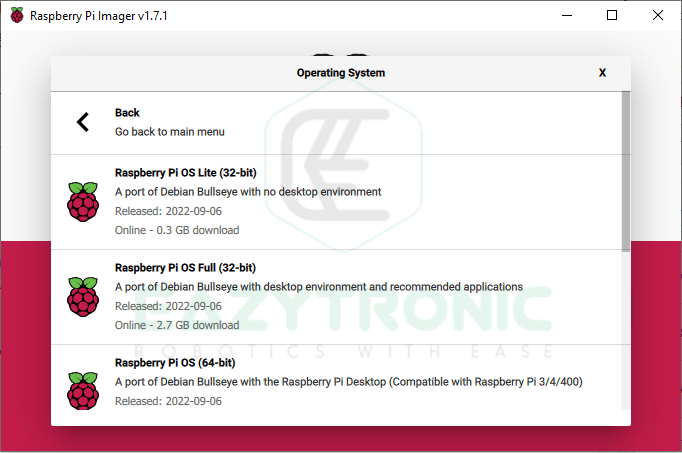
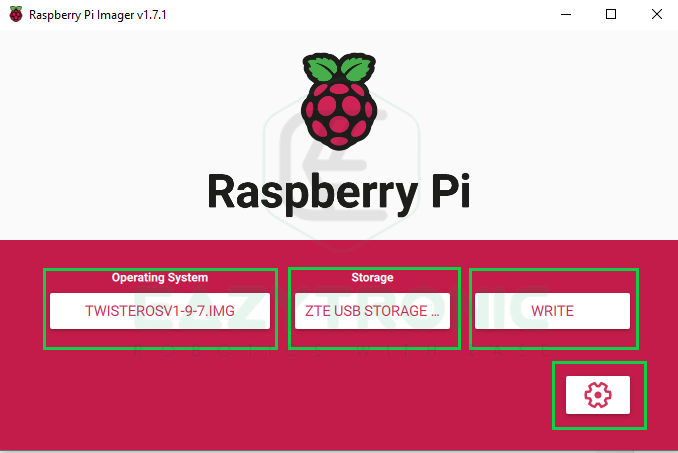
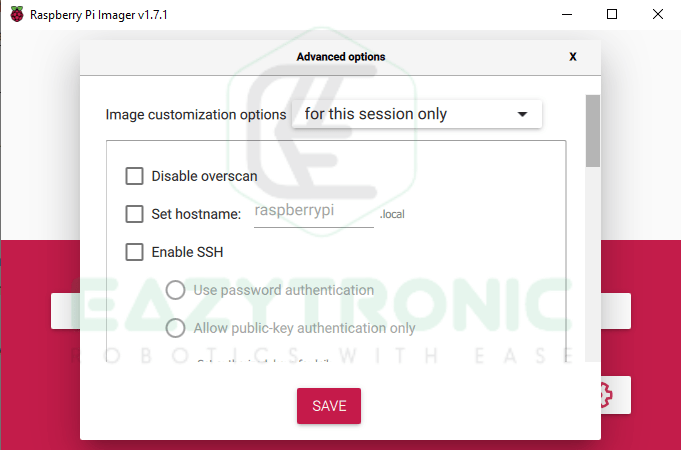
To install the OS, Open Raspberry Pi Imager and complete up to the steps mentioned in the Preparing SD Card section. After this, from the select OS drop-down menu, either select the preferred OS or choose the custom OS file downloaded in the last section. Now just press the write button and wait for the process to complete. After the process has been completed along with verification. Remove the SD Card from the system and insert it into the Raspberry Pi.
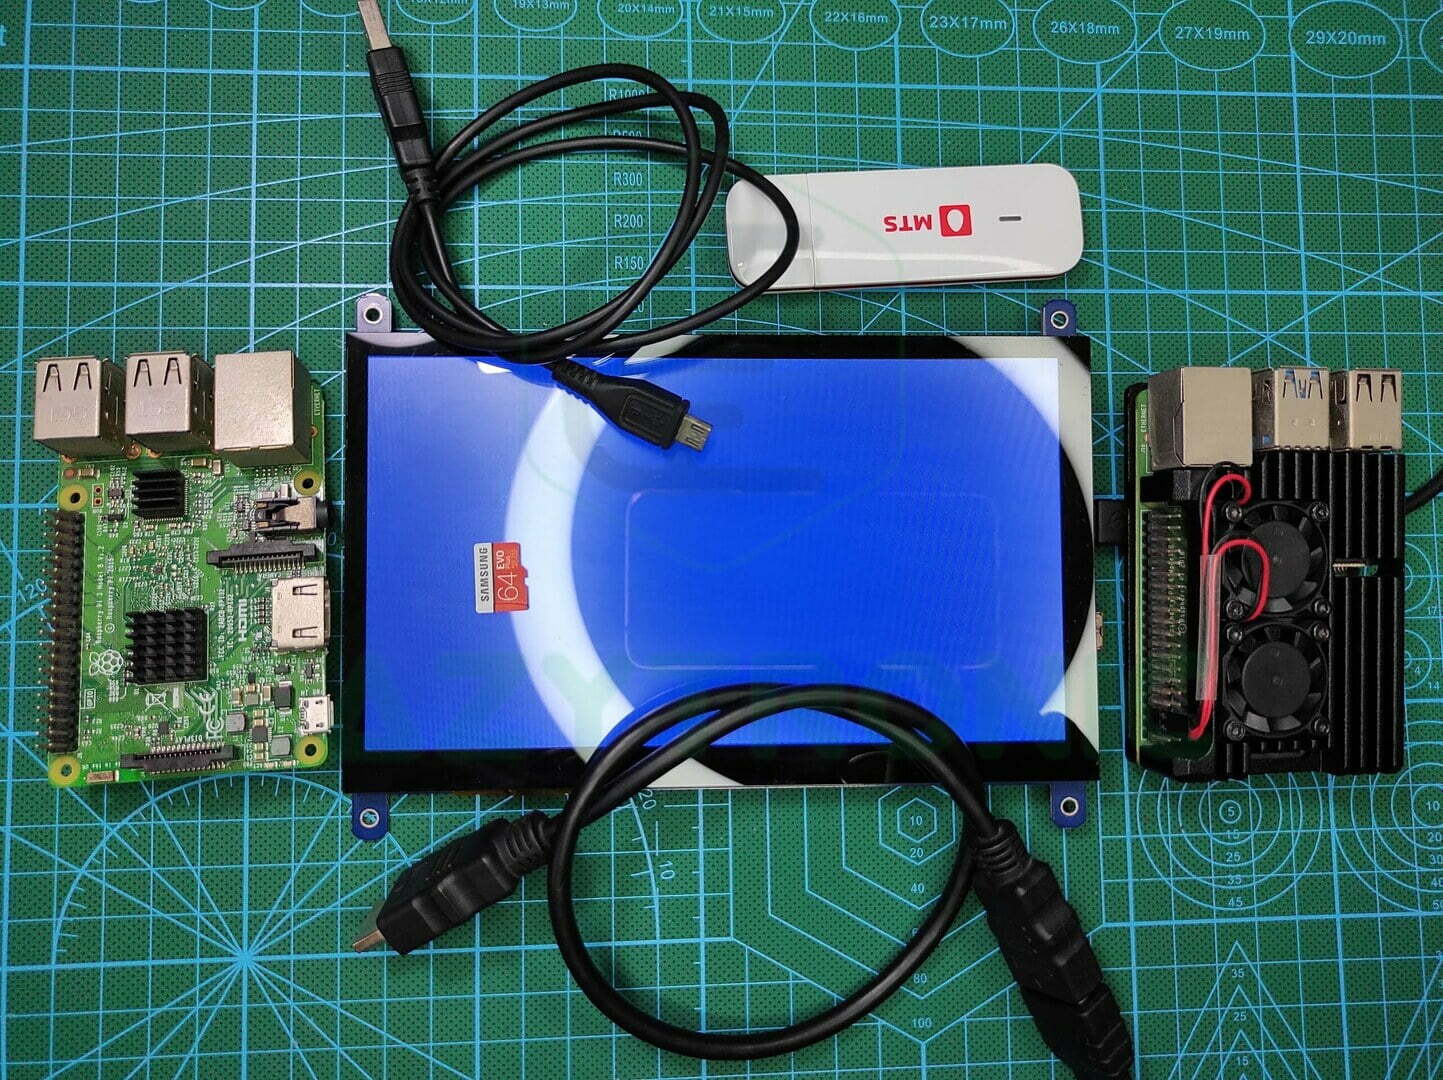
Attaching Peripherals
After you have completed all the steps mentioned previously, connect the mouse and keyboard to Pi. Furthermore, also connect the HDMI display monitor via micro-HDMI to the HDMI cable. Make sure to use a 5V @ 3Amp adapter for smooth performance, else it will hang sometimes. Plug in the power adapter and wait for the logo to boot up.
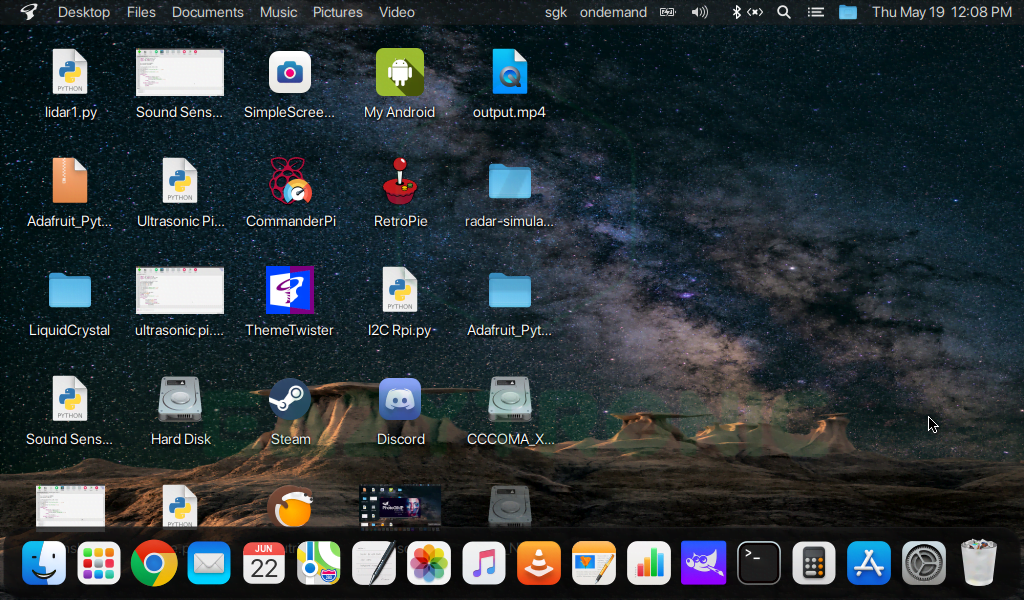
First boot
On the First boot, there will be several settings that need to be done. Complete them and come to the main home screen. Below are the images for both Twister OS and Raspbian for reference.
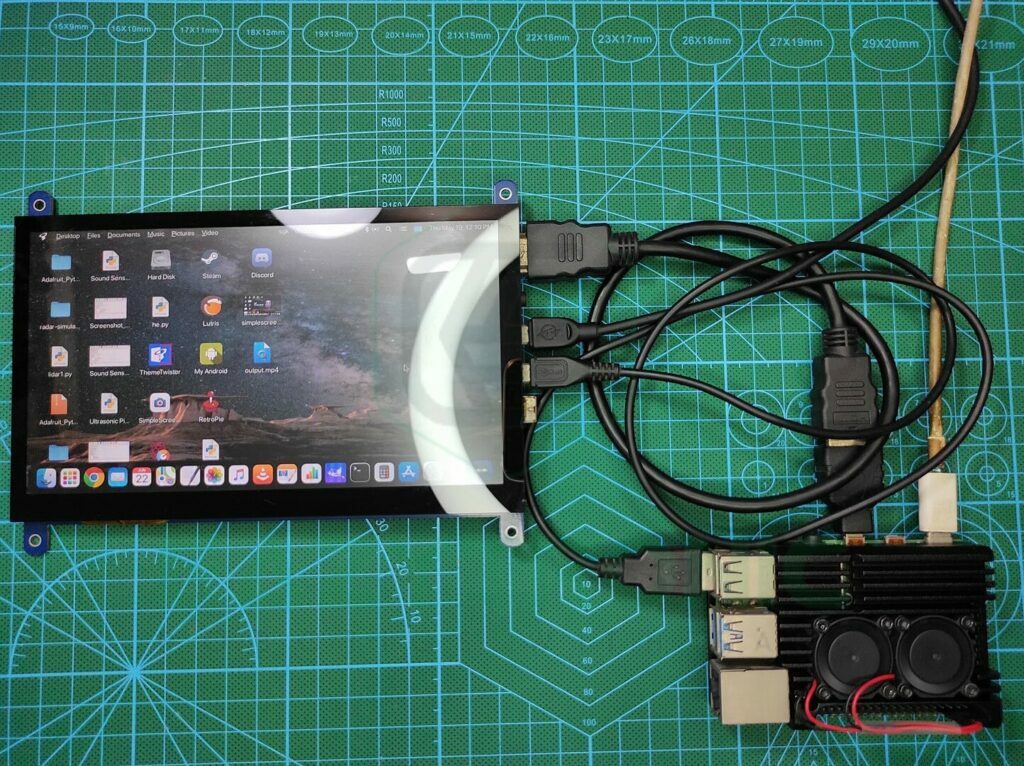
Using Touch HDMI display
You can also use a Touch Screen HDMI Display with Raspberry Pi, but for that, you’ll need to do some changes to some files. Moreover, you need to power the display from a separate power source. As powering it with pi will coat much load on the power IC of Raspberry Pi. Also, make sure to use the right cable as the one I have is not that good, so I bought a good one. I have a 22SWG HDMI to micro-HDMI cable, which is awesome.
Editing files
For making the display work, you need to edit the files to the correct resolution. You can do this in two ways, either within the OS or via the terminal window. Another way is to plug the SD card into a different machine and then edit the files. In both cases you need to do the same thing, hence the choice is yours.
For terminal window below are the line of code copy and paste them one by one. For different machine section head on to next paragraph.
cd //
ls
cd boot
ls
sudo nano config.txt

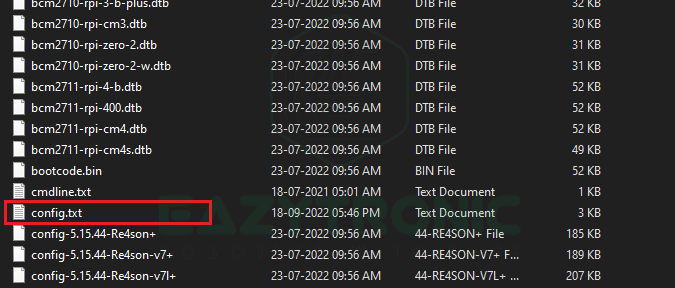
Search for a drive with the name boot and open it now search a file with the name config.txt. You need to edit this file. Copy the following code corresponding to your Pi Board at the last. Now reboot the system. Once you reboot, you’ll see everything changes.
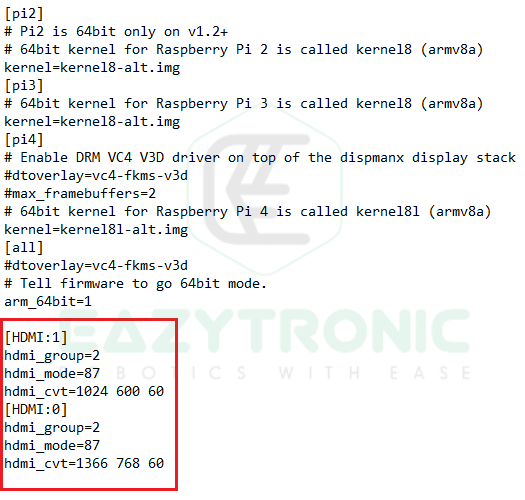
# for Pi 4
[pi4]
[HDMI:0]
hdmi_group=2
hdmi_mode=87
hdmi_cvt=1366 768 60

[HDMI:1]
hdmi_group=2
hdmi_mode=87
hdmi_cvt=1024 600 60

#for Pi 3
[pi3]
hdmi_group=2
hdmi_mode=87
hdmi_cvt=1024 600 60
Decoding code lines
For decoding the line of code refers to this website, here you’ll find all the information regarding all the lines of code. Config.txt. Nevertheless, in brief, I’ll explain here. These two lines hdmi_mode & hdmi_group together define the type of output via the HDMI port. The next line, i.e., hdmi_cvt forces the desired resolution settings via the HDMI port. As for HDMI port 0, I have chosen the resolution according to my 7-inch Touch display and for HDMI Output 1 for an external monitor.
Also make sure to read the FAQ of the downloaded OS for information, like on TWISTER OS there are instructions for installing on PI 3 & PI 4.
With this, we have completed today’s tutorial. I hope you’ll be able to set up your pi after reading this. If you face any issue, ask below in comment, I’ll resolve it ASAP. Also make sure to read our other article Arduino, ESP8266 NodeMCU, ESP32, PI PICO.